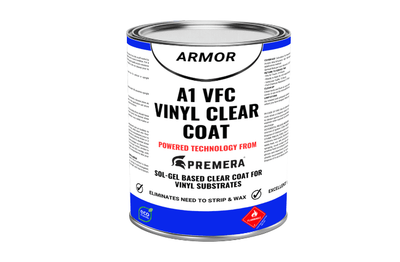
Delivers outstanding resistance against abrasion and chemical agents, all while preserving the lustrous finish of VCT or vinyl floors. This transparent quartz layer effectively removes the necessity for frequent stripping and waxing. A superb way for institutions that have large areas of vinyl with high traffic such as hospitals & schools to reduce labor and material costs to maintain clean and sanitary floors. Plus when your floor needs to be cleaned it will now be much easier thanks to the nano technology that prevents dirt and grime from sticking to it and being ground into your porous flooring or wax coating. No more stripping! No more wax!
Single Component, Sol-Gel Based: Easy to use spray on application(Acetone Resistant Pump Sprayer) and does not require mixing multiple components.
Clear Liquid Quartz Coating: Cannot be compared to any sealer. The clear liquid quartz coating forms a transparent layer on the flooring surface. This maintains the natural appearance of the flooring while providing durable protection while enhancing the appearance.
Protection: Offers protection against abrasion and chemicals. This is particularly important for commercial or high-traffic areas where the flooring may be subjected to heavy wear and tear. Typical Vinyl sealers are not much better than wax when it comes to durability, they need constant stripping and recoating.
Gloss: High gloss finish Reduced Maintenance Costs: One of the significant benefits mentioned is that the clear quartz layer eliminates the need for regular stripping and waxing/sealing of the floors. This can lead to cost savings in terms of maintenance, as these processes can be time-consuming and require repeated material purchases.
Unit size is 1 Gal. Coverage is an average 650 sf/gal. Only one coat is needed.
To order sprayer, order 1 gallon with sprayer and Add To Cart then Keep Shopping and order any additional gallons needed without sprayer.
PLEASE NOTE THAT THIS PRODUCT IS NOT RETURNABLE DUE TO SHIPPING RESTICTIONS.
NEW VINYL FLOORS New vinyl floors must be coated with a good quality acrylic emulsion wax that is burnished to desired shine as a base prior to applying the Armor Vinyl Coat. Any visible marks or dirt not cleaned prior to the application will show through our coating. Must ensure Armor Vinyl Coat does not negatively react or emulsify acrylic wax.
EXISTING VINYL FLOORS Existing vinyl floors do not need to be stripped unless they are in bad condition. The existing floor should have a quality acrylic emulsion wax as a base that is in good condition. Burnish the last coat to the desired shine before applying the Armor vinyl Coat. Ensure Armor Vinyl Coat does not negatively react or emulsify acrylic emulsion. Any visible marks or dirt not cleaned prior to the application will show through coating.
APPLICATION Make sure to sample Armor Vinyl Coat in an inconspicuous location before applying to entire area to ensure desired results are achieved. Once surface has been properly cleaned and prepared, mask off any adjacent surfaces to avoid accidental coating. Inspect and clean one more time to make certain no contaminates got on floor after masking. Stir the contents gently to resuspend the nano particles that have settled to the bottom. Make certain these materials get completely mixed into the container.
Once contents are gently stirred in the container to resuspend the nano particles that have settled to the bottom pour into Acetone Resistant Hand Pump Sprayer. Product must be sprayed on and sprayer must be acetone resistant. Order sprayer with product or purchase separately. Using an acetone/alcohol proof pump sprayer or equivalent, install a red fan tip on the wand, as this provides the most even application. It is recommended to keep an even amount of pressure while spraying in order to keep a consistent look. We recommend hooking up a compressor and air hose with a quick release to the valve stem on the acetone proof pump sprayer and then supply the sprayer with a constant 25-30 PSI. This will provide an even flow and finish. To start spraying, hold the tip square to the surface being coated at a distance of 10″ to 12” off the floor. In a separate container, begin spraying into the container to avoid initial spitting of product on the floor caused from air trapped in the spray wand. When you stop spraying, also stop the flow in the separate container, as spray wands often drip a few drops after handle is released. You want to provide even distribution of the coating, so a smooth circular motion should provide good coverage. This product should go on thin and never allow puddling. It is always best to spray on a few mockups to get the feel of applying this product before attempting an actual project. Be careful not to apply too thick (THIN TO WIN) or allow the product to puddle, as this will cause too much surface tension and possible bubbles or delamination. Do not apply a second coat unless there is a flaw in your application of the first coat. If a second coat is necessary, wait 24 hours for the surface to dry. Then abrade the surface with 400 grit sandpaper or a green pad on a buffing floor machine to allow the second coat to bond. Clean floor of dust and reapply.


