


-

ARMOR CHIP GARAGE EPOXY FLOORING KIT
$389.00 - $410.00 -

-

2 LAYER COMMERCIAL EPOXY FLOORING SMALL FORMAT PER SF
$1.42 - $1.99 -

METALLIC EPOXY FLOORING
$1,599.00 -

EPOXY BONDING PRIMER
$120.00 -

INSTANT EPOXY CRACK REPAIR
$110.00 -

ULTRA OIL STAIN PRIMER
$290.00 -

A TALE OF TWO EPOXY COATINGS

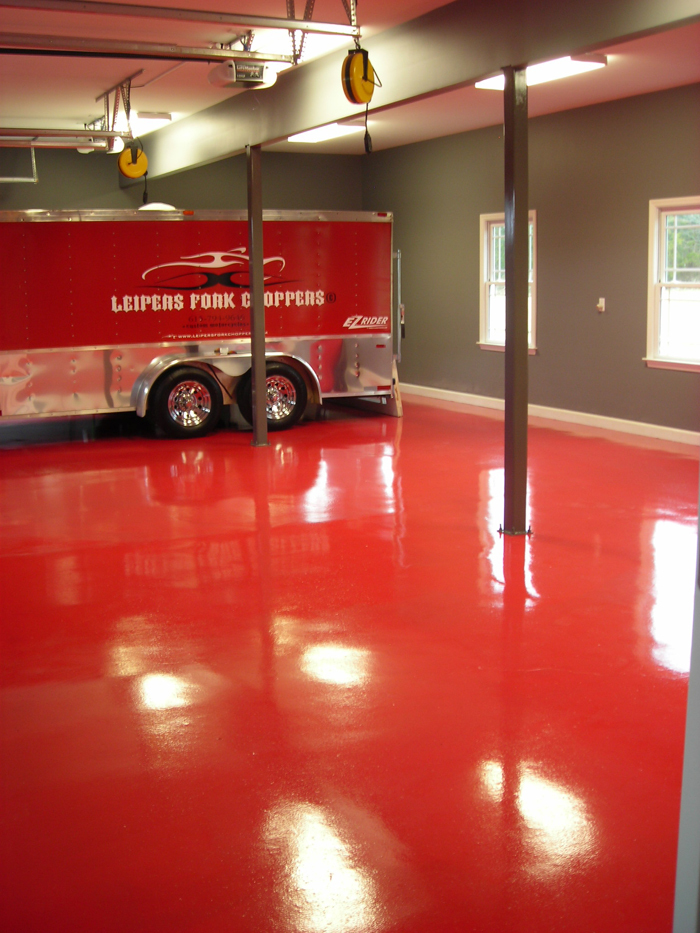
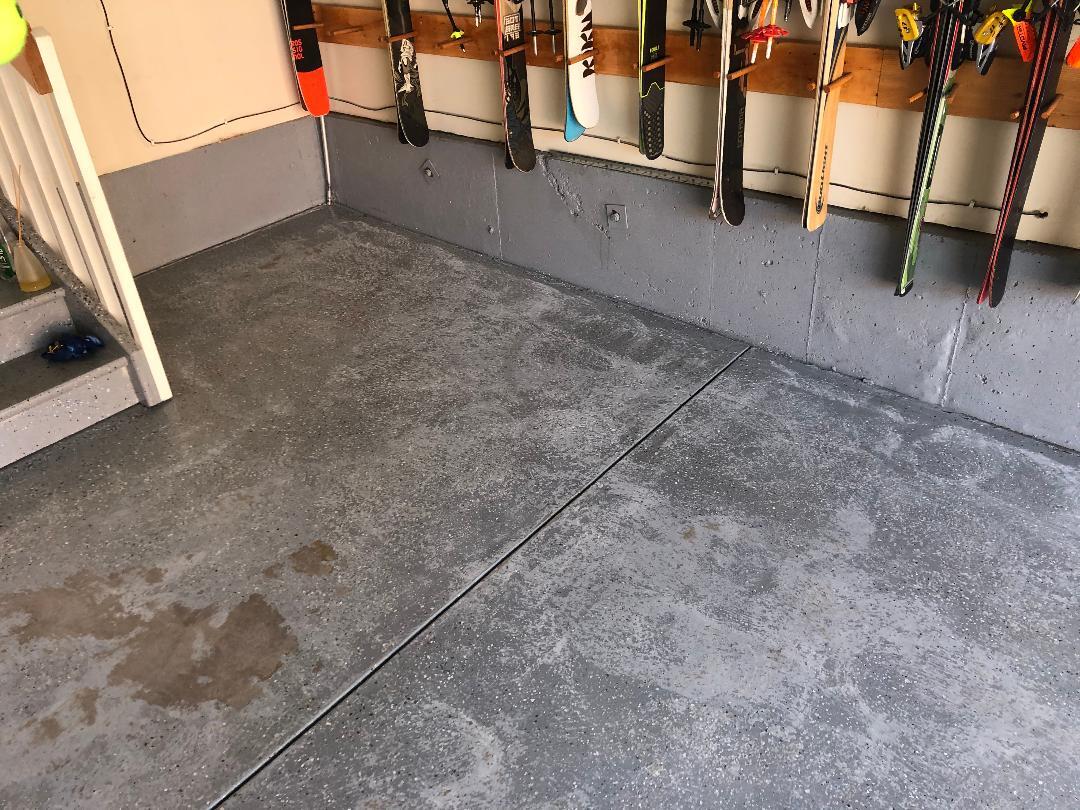
Getting an epoxy floor coating like those in our customer photos is one part of the job. Having it last and look good for 15-20 years is the other part. The image of John and Eric's floor above is proof positive!
"Hey Jim, Eric Pfieffer here from Miami. Thought you would find this picture interesting! You sold me the Armor Chip garage flooring kit (floor on the right) with the standard topcoat and my friend John did his floor with an epoxy kit from the local big box store to save some money (oil stained floor on the left). Both floors looked similar, but that didn't last more than a year, and the difference now is amazing! My floor still looks good and cleans up real easy, but it's getting to the point where it could use a freshening. I'm going to use the Military Topcoat to give it that new look again after a light sanding to rough it up. John was told he needs to do a complete diamond grind on his spot! I'm figuring the military topcoat will give me a finish I'll never have to redo, judging by how long the standard topcoat lasted, which is now going on over 10 years. Speak to you soon (so will John!) and thanks for a fantastic product and your great customer service!"
We're not sure what better proof you could ask for than the picture and testimonial above from Eric in Miami that ArmorGarage epoxy floors are the better choice. Our epoxy paint and flakes remain unscathed while our standard clear topcoat shows some cosmetic signs of wear from twisting turning hot tires in a tight parking space after 10 years.
As Eric states, all he needs to do to bring his floor back to brand new is a light sanding and roll on a coat of the military grade clear topcoat for another 15-20 years of service. While John who ended up in situation #2 had severe buyer's remorse has to do a complete diamond grind plus difficult oil stain removals after having to live with an ugly and a completely failed floor after barely a year.
If this happens in your home garage the worst thing besides the extra cost of reding the floor is having to take out all your stuff AGAIN!
SIDE BY SIDE COMPARISON WITH THE COMPETITION
Low priced epoxy kits are usually thin water-based, fake 100% solids or lower solids based epoxies with either an inferior topcoat or none at all. They never yield their advertised coverage and require multiple kit purchases to properly hide the concrete, and last only a fraction as long as an ArmorGarage floor. Are you really saving money if the bargain epoxy you bought doesn't fully hide the concrete and requires you to buy more material and do additional coats?
Watch this video to see a side by side comparison between an ArmorGarage epoxy floor and the competition. Its not even close.
Even the worst looking floors come out looking like a showroom finish as you can see in the before & after images below by Alan in Denver. His floor was a mess with with years of road salt damage and oil stains but even though he never did anything like this before, his floor turned out as if he paid a professional to do it for thousands.
He left the control joints unfilled as we always recommend, they add a sort of dimension to the floor and makes it look like large slabs of granite. He used medium gray with military topcoat with black, white and primary blue flake.
A BEAUTIFUL TRANSFORMATION

PREPERATION & PRIMERS
Before you buy any garage epoxy floor coating, be sure to read our How To Epoxy Paint Your Floor page on what and what not to do so you end up with a beautiful floor that lasts! We recommend using a primer even though it's not required it's a very good idea to prime your floor as you would if you were painting your house, car or other porous surfaces. This ensures the highest level of adhesion, increases coverage of the epoxy by up to 25%, and increases the thickness of your floor to a whopping 25-30 mils thick. So if your floor is 600-700 sf order one 600 sf epoxy kit and the 900 sf primer option and the appropriate topcoat size if doing the military grade option. This way you get the benefit of an extra epoxy layer and not have to buy two epoxy kits(600sf + 300 sf).
Remember the best prepped floor is of no value if an inferior epoxy paint coating is applied to it, and the best epoxy paint coating is of no value if applied to a poorly prepped floor!
Important Things To Know About Garage Flooring Epoxy Coatings
It's important to know are that you have to have an epoxy finish that has a polyurethane topcoat with a maximum of a 20mg abrasion loss rating or lower(the lower the number the better). Our heavy duty topcoat that comes standard with each garage floor kit is for your average garage owner that pulls their cars in and out and has the standard items you find in most garages.
TOPCOAT GUIDE
For garages that have vehicles with nonstandard tires such as off road tires, racing tires, golf carts, tractors or trailers then you need a topcoat with 10mg or lower abrasion rating. Same goes for garages that are used as workshops with items such as floor jacks, tool chests or equipment
.
We offer a military grade topcoat option that has a best in class 4mg loss rating. this offers you a super hard finish that can handle anything you put in your garage or anything you do on your garage floor. Coatings with ratings higher than 20mgs offer very little wear protection.
Every time you drive your car on it, every time you walk on it, every time you roll something on it abrasion occurs. This abrasion can wear through low quality epoxies and topcoats very very quickly! So even though your epoxy is still stuck to your floor, you're stuck with a poor looking floor that is not covered under any guarantee!
AVOIDING BUYER'S REMORSE
When you read about complaints or dissatisfaction with epoxy floors on social media platforms it's almost always due to improper floor preparation and or the use of a low-quality epoxy coating.
There's a reason why we provide all the information we do, it's to help you avoid becoming dissatisfied with your floor.
FLOOR PREP ADVICE
If you're not diamond grinding or renting the Floor Prep Machine from Home Depot you must acid etch the floor. In fact if your floor is very dirty or is new concrete and or was power troweled you need to do two etchings. A power washing is also recommended.
See the Application Instruction Tab for full details, please read, this is not like store bought epoxy.
ABOUT FULL BROADCAST
We get asked about doing full coverage of color flakes. This is not a good idea if you're not a professional. It's very difficult to get that amount of flakes to lay evenly and uniformly. More often then not the floor will look lumpy and unbalanced color wise requiring you to do extensive amounts of scraping and sanding. You need to have an extra thick epoxy to handle 75- 100lbs of chips otherwise you will have delamination issues in the future.
We know, we've seen it happen many times from customers who were not aware how difficult it was to do and did not use the right epoxy. Plus you need double the topcoat to fill in all the nooks and crannies.
If you like the heavy flake look use our Armor Granite Kit with close to 90-95% coverage and always comes out perfect with a real granite floor look.
Frequently Asked Questions