How Long Does Epoxy Paint Take to Dry?
Posted by Armor Garage LLC on May 1st 2025
When it comes to strong and visually appealing flooring solutions, epoxy paint stands out for its durability, long life, and glossy finish. Whether you're upgrading your garage or refreshing a workspace, knowing how long epoxy paint takes to dry is essential to achieving a smooth, lasting result. With the right product and preparation, epoxy application can be a rewarding DIY project. In this guide, we’ll break down the drying process, key factors affecting cure time, and how DIY users can get great results using ArmorGarage epoxy kits.
What Is Epoxy Paint?
Epoxy paint, sometimes referred to as an epoxy coating, is a two-part system made of epoxy resin and a hardener. Once mixed, this combination forms a tough, seamless surface that bonds directly to concrete. Known for its resistance to wear, chemicals, and heavy impacts, epoxy is ideal for garages, workshops, and commercial areas.
Unlike traditional paints that sit on the surface, epoxy chemically bonds with the concrete, forming a thick, durable layer. This makes it especially popular with DIY users who want to enhance the look and performance of their floors using high-quality materials that last for years.
The Process of Applying Epoxy Paint
Applying epoxy paint successfully involves a few key steps that are easy to follow using a DIY epoxy kit. Here's an overview of the process:
Surface Preparation
Proper surface prep is the most important part of any epoxy application. The floor should be clean, dry, and free of grease, debris, or existing coatings. Cracks and holes should be filled, and depending on the condition of the surface, light etching may be needed to improve adhesion.
Primer Application (If Required)
Some ArmorGarage epoxy kits include or recommend a primer to further strengthen the bond. If included, it should be applied to the prepared surface and given time to dry before applying the epoxy.
Mixing and Applying the Epoxy
The resin and hardener components are mixed thoroughly and then rolled or brushed onto the surface in even, thin coats. Most DIYers apply one or two coats for full coverage. Following the instructions provided in the kit ensures each layer dries properly and bonds effectively.
Topcoat or Clear Coat
For added protection and a glossy finish, ArmorGarage kits may include a clear topcoat. This layer enhances durability and appearance, especially important in areas with heavy foot or vehicle traffic.
Taking your time and following each step properly is key to achieving a durable, attractive result.
How Long Does Epoxy Paint Take to Dry?
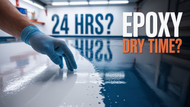
Typically, epoxy paint dries to the touch within 24 hours, but full curing can take 3 to 7 days. It's important to distinguish between drying and curing:
- Drying Time: When the surface feels dry and can handle light foot traffic.
- Curing Time: When the epoxy has reached full hardness and chemical resistance. This is when the floor can handle vehicles or heavy loads.
Always follow the drying and curing guidelines included with your ArmorGarage epoxy kit, as some systems may cure faster or slower depending on the formula.
Factors That Influence Epoxy Drying Times
Ambient Temperature
High humidity (over 50%) can interfere with the curing process, resulting in a tacky finish. It’s best to apply epoxy in dry, climate-controlled conditions for optimal results.
Humidity
High humidity (over 50%) can interfere with the curing process, resulting in a tacky finish. It’s best to apply epoxy in dry, climate-controlled conditions for optimal results.
Type of Epoxy Product
Not all epoxy products are the same. ArmorGarage offers a wide range of solutions designed for different needs, from quick installations to heavy-duty applications. Always choose the formula that best fits your project.
Thickness of Application
Applying epoxy in thin layers allows it to dry and cure more evenly. Thick layers may trap air or moisture, affecting the finish and durability.
Surface Preparation
The bond strength of epoxy depends heavily on surface prep. A clean, prepped surface ensures proper adhesion and prevents issues like peeling or bubbling later on.
Tools and Environment
Using the right tools, like rollers, mixing paddles, and fans for airflow, can make a big difference. While heat lamps can speed up curing in cold environments, they should be used cautiously to avoid overheating.
Why Following Drying Instructions Matters
Rushing the curing process or using the floor too early can result in premature wear, bubbling, or reduced durability. ArmorGarage kits include detailed curing timelines that ensure your floor reaches maximum strength before heavy use.
For example, garage floors that aren't fully cured may peel or lift under hot tires. Giving your epoxy the proper time to set helps ensure long-term performance and a finish that lasts for years.
Designed for DIY Success
ArmorGarage epoxy kits are built with DIY users in mind. Everything you need, from surface prep instructions to precisely measured components, is included. With detailed guides and easy-to-use tools, even first-time users can achieve professional-looking results without hiring anyone.
Get Reliable Results with ArmorGarage Kits
Understanding the drying and curing process is essential for maximizing the performance and longevity of your epoxy floor. Whether you’re coating a garage, workshop, or commercial space, ArmorGarage provides premium DIY epoxy systems engineered for long-lasting results.
Our epoxy products are designed to be easy for first-time users while delivering unmatched strength, thickness, and durability. With ArmorGarage, you get the confidence and tools to complete your project right, no professional installation required.


