

About Our Rubber Epoxy Coating
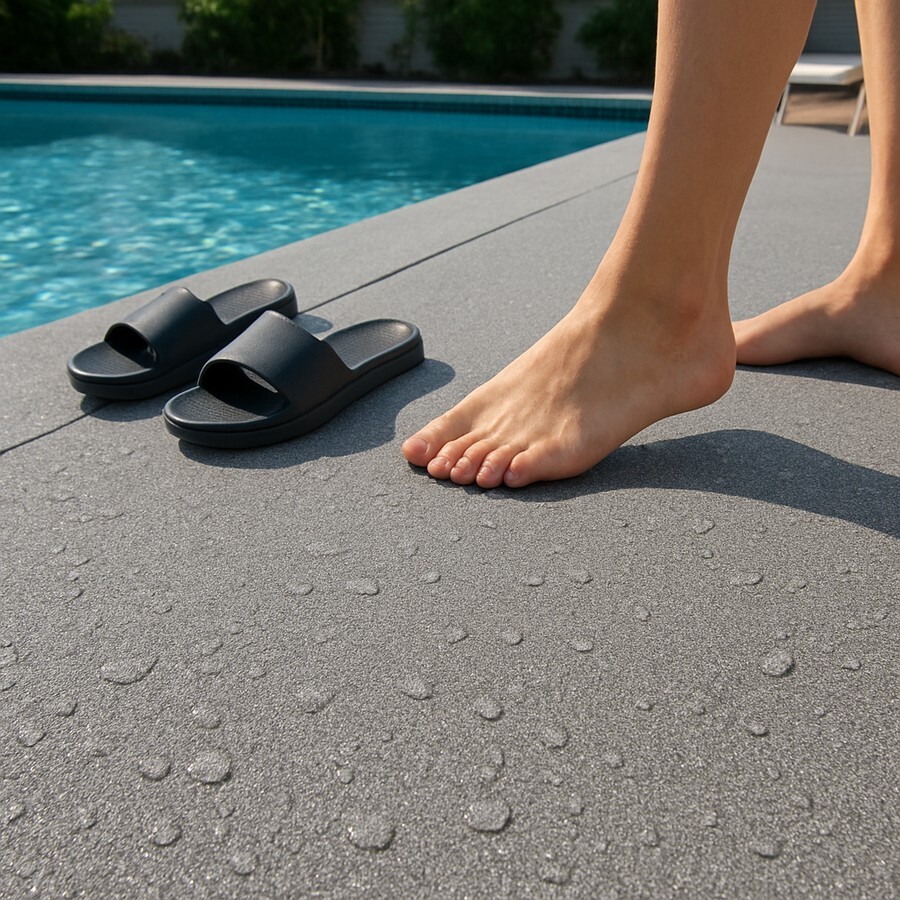
Our rubber epoxy coating adds slip resistance and long-term surface protection. It bonds to concrete, wood, metal, fiberglass, and tile. Use it on pool decks, ramps, stairs, walkways, bridges, and docks. The textured finish improves footing in wet or high-traffic areas.
This coating handles heavy foot traffic and resists weather and chemicals. It holds up to high heat and will not peel, chip, yellow, or fade. On tile, apply a bonding primer first. For roof decks, install two waterproof membrane coats before application. Once cured, removal requires grinding, but recoating stays simple; new coats bond to old layers for simple repairs.
What Is Rubber Epoxy Coating?
Rubber epoxy coating is a thick epoxy with textured traction. It cures into a flexible layer that bonds to prepared surfaces. The coating forms a durable finish built for foot & equipment traffic.
Texture creates grip through the surface being embedded with high grade rubber granules that won't wear out of the coating like many other competeting brands do. Thickness and adhesion protect floors from wear and moisture.
This coating is not a paint, spray rubber, or liquid membrane. It suits ramps, stairs, pool decks, walkways, docks, bridges, and steps. Use proper prep, primer on tile, and membranes on roof decks.
Where Rubber Epoxy Coating Works Best
Rubber epoxy coating works best where traction and durability matter. These areas face moisture, wear, and regular foot traffic.
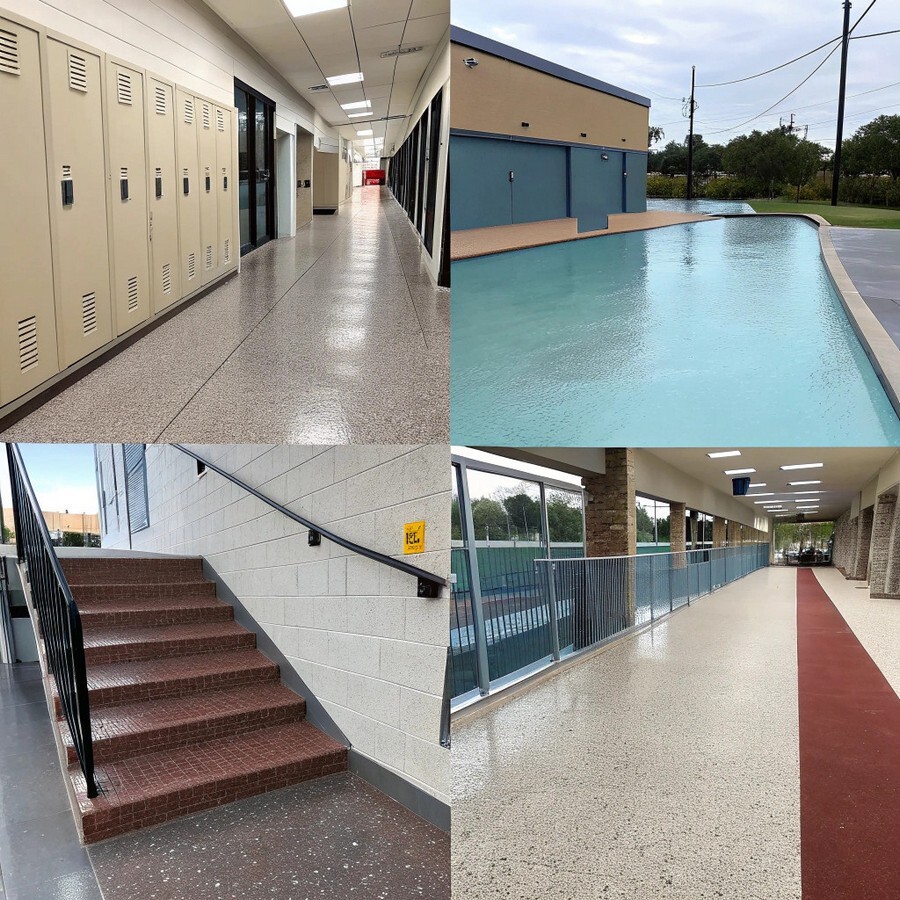
- Concrete floors: Supports wear resistance and everyday foot traffic.
- Pool decks: Reduces slip risk around standing water.
- Ramps and stairs: Improves traction on sloped walking surfaces.
- Locker rooms and wet corridors: Manages moisture and frequent slip risk.
- Entryways and walkways: Limits tracked water and surface wear.
- Retail back-of-house: Handles spills and frequent foot traffic.
- Mechanical rooms: Resists moisture and light chemical contact.
- Pedestrian lanes (warehouse): Supports repeated foot traffic movement.
- Patios and balconies: Manages outdoor wear and moisture exposure.
Choose texture based on traffic level and wet conditions. Proper surface prep helps the coating perform as expected.

What Surfaces Can You Coat?
You can use rubber epoxy coating on many common surfaces. What matters most is how the surface looks and feels before coating. Each material reacts differently during application. When you prep the surface the right way, the coating stays in place and lasts through daily use.
Concrete Floors and Slabs
Concrete works well when the surface stays open and free of buildup. We recommend preparing the floor so the coating can settle into the surface. If moisture stays trapped below, the coating may not hold over time.
Wood Decks
Wood decks need firm boards and tight fasteners before coating starts. Your coating must move with the wood as temperatures change. We always suggest checking for loose boards before applying anything.
Metal Surfaces
Metal surfaces need extra attention before coating. Remove rust, oil, and loose residue first. Light surface roughening helps the coating stay in place. We see the best results on solid, bare metal areas.
Fiberglass Panels and Decking
Fiberglass often feels slick before coating. A light surface scuff helps the coating grab properly. We also recommend wiping the surface so nothing blocks contact.
Tile Floors and Walk Areas
Tile surfaces need special prep before coating. Glazed tile does not allow direct bonding. A bonding primer helps the coating hold to the surface. Pay attention to grout lines so coverage stays consistent.
How to Apply Rubber Epoxy Coating
When you apply rubber epoxy coating, follow the steps in order. Each step helps the coating stay in place and last longer. Complete each step fully before moving to the next.
Check the Surface
Check your surface for cracks or loose areas. Fix these issues before applying any coating. The coating follows the surface shape underneath.
Prepare the Surface
Concrete should feel open, not smooth or sealed. Wood must feel solid with boards firmly attached. Metal should be bare without rust or loose paint. Fiberglass and tile need light scuffing for better hold.
Use Primer Where Needed
Tile always needs a bonding primer first. Some smooth surfaces may also need primer. Let the primer sit before adding the coating.
Mix the Coating
Mix the coating exactly as the instructions say. Use full kits unless directions allow smaller mixes. Incorrect mixing can cause weak or soft areas.
Apply the Coating
Spread the coating across the surface using proper tools. Keep moving to avoid thick or thin spots. Do not stop in the middle of an area.
Add Texture
Add texture while the coating is still wet. Use the amount listed in the product instructions. Texture improves grip in wet or sloped areas.
Let the Coating Dry
Keep people off the surface while the coating dries. Allow the full drying time listed in the instructions. Early use can damage the finish.
Apply Another Coat if Needed
Some projects need more than one coat. Apply the next coat within the allowed recoat window so layers bond correctly.
Why Use a Rubber Epoxy Coating
You use rubber epoxy coating to add grip and longer surface life. Paint wears out in busy areas where people walk daily and floors get wet.
The textured surface helps your feet keep grip while walking. It holds up under repeated foot traffic with fewer touchups. Wet areas feel safer to walk across each day.
Over time, you do fewer repairs on worn surfaces. Repainting cycles slow down once the coating fully sets. Cleaning is simple compared with paint or thin coatings. We recommend it when safety matters and upkeep needs remain low.
Common reasons people choose rubber epoxy coating include:
- Better grip on ramps, stairs, and walk paths
- Longer surface life than basic paint
- Fewer repairs in busy walking areas
- Simple cleaning after the coating sets
How to Prepare Surfaces for Rubber Epoxy Coating
Preparing the surface controls how long your rubber epoxy coating lasts. Your surface condition matters more than the coating you choose. Problems left on the surface will show through after curing.
Start by removing dirt and loose material from the surface. Fix cracks, weak spots, or loose boards before you apply coating. Prep should match what your surface needs, not rushed work. The coating will follow the surface shape already there.
Concrete, wood, and metal each need different preparation steps. Fiberglass and tile need light scuffing before you apply coating. Some surfaces need primer before coating begins.
Why Rubber Epoxy Coating Holds Up in High-Traffic Areas
Busy areas wear floors faster than most people expect. Constant walking puts stress on surfaces each day. Paint and thin coatings break down under repeated foot traffic. Rubber epoxy coating handles this wear for longer in busy spaces.
The textured surface spreads pressure across the floor. Added thickness reduces wear from daily walking. The coating moves slightly instead of cracking or peeling. Grip feels the same after many people walk across it. You spend less time fixing worn areas in high traffic zones.
How to Choose the Right Rubber Epoxy Coating
Before you buy, think about where you will use the coating. Each surface and area needs the right prep and texture. When you choose the right match, the coating lasts longer.
- Surface type: Concrete, wood, metal, and tile need different prep. Some surfaces also need primer.
- Traffic level: More foot traffic usually needs more texture. Carts and equipment may need a tougher build.
- Water contact: Pool decks and locker rooms need grip when wet.
- Outdoor use: Sun and weather matter, so choose an outdoor-rated product.
- Texture level: More texture adds grip but needs more scrubbing.
Rubber Epoxy Coating FAQs
Click a question to expand the answer. Use Open All / Close All if you prefer.
Rubber epoxy coating is used to add grip and surface protection in busy or wet areas. People use it on pool decks, ramps, stairs, walkways, and other places with regular foot traffic. It works indoors and outdoors and applies to concrete, wood, metal, and tile when the surface is prepared correctly.
Rubber epoxy coating is made to handle water on the surface without breaking down. You can use it in wet areas where water sits or runs across the floor. This makes it a good choice for pool decks, ramps, docks, and other walking areas that stay wet. Proper surface prep is still required so water does not get trapped below the coating.
Rubber epoxy coating cures in stages, not all at once. You can usually apply the next coat after about 5 to 5 hours. Light foot traffic is possible after overnight drying. Wait about 24 hours before regular use. Full cure takes around 48 hours, depending on temperature and surface conditions.
Yes, rubber epoxy coating works well in areas with constant foot traffic. It is commonly used in places where people walk all day, such as ramps, commercial kitchens, corridors, and public walkways. The textured surface helps reduce wear from repeated use. It can also handle light rolling traffic from carts when the surface is prepared correctly.
Rubber epoxy coating typically covers about 150 square feet per gallon. This amount accounts for two coats using the proper textured rollers. Coverage can change based on surface condition, color choice, and how the coating is applied. Orders start at 150 square feet, with additional quantities available in 75 square foot increments.
You can clean a textured rubber epoxy surface with regular sweeping and mild washing. It handles oil, grease, and common spills without special cleaners. For deeper cleaning, rinse with water and use a soft brush if needed. If wear shows over time, you can refresh the surface by applying a new coat directly over the old one.