

Kitchen & Food Processing Epoxy Floor System
Chemically hardened epoxy flooring engineered for the toughest kitchen environments
★ USDA Approved for All Food Service Applications —FREE SHIPPINGSystem Features at a Glance
Why Commercial Kitchens Need This Epoxy
Commercial kitchens and food production facilities have one thing in common — they both need flooring that is super tough and easy to clean. They need to take anything and everything chefs and production processes can throw at them without being damaged, and they need to come clean fast and easy.
Very few epoxy floor coatings have all the characteristics needed to survive long term in these environments. They must have high adhesion ratings, high hardness ratings, high impact resistance, and a very low abrasion loss rating. These are the four most critical factors that determine how well an epoxy floor coating will perform under harsh conditions — and this system rates best in all four categories.
What Won't Work: So-called "high solids" epoxies, water-based, or hybrid epoxies such as cycloaliphatic epoxies have no chance at surviving long term in commercial kitchens.
Industry-Leading Hardness Rating
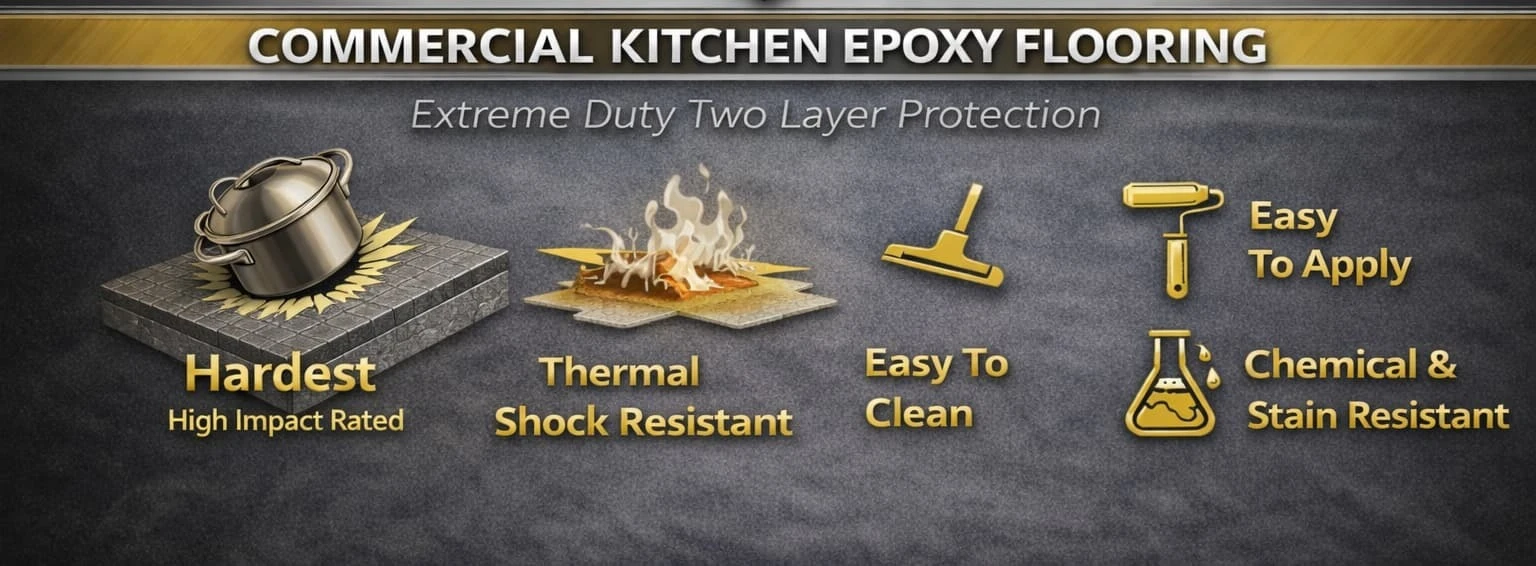
Our epoxy has the hardest chemically cross-linked finish with a Shore-D hardness rating at the top of the chart — well above the hardness of even construction hard hats. Combined with the highest adhesion ratings, highest impact ratings (up to 160 ft/lbs), and lowest abrasion loss rating, this is the most durable epoxy system available for food service environments.

Chris C - LeeCheek Nutrition | Verified Shopper Approved Review
“Did our facility 10 years ago, still looks new!”
“Fast Service, Knowledgeable Sales Guys.”
Built to Handle the Worst Abuse
- Dropped heavy pots, pans, mixing bins, and dishes have no effect on this coating
- Hot oil splashes up to 350°F — other epoxies will boil right off under a hot oil spill
- Heavy forklift traffic and constant heavy impacts handled with ease
- Power washings and caustic wash downs — no damage, no delamination
- Waterproof, mold proof, mildew proof, and bacteria proof
- Self extinguishing — fire-safe for commercial kitchen requirements
Lower Total Cost of Ownership: Although your first install cost may be slightly higher, this coating lasts five times longer than standard epoxies — eliminating critical downtime, the expense of redoing your floor every couple of years, and the unhappy health inspector seeing a shabby floor with exposed concrete.
What's Included in Every Kit
Need Slip Resistance? Purchase our heavy-duty nonslip additive that mixes directly into the epoxy or can be broadcasted into the squeegeed epoxy and then back-rolled. We recommend 3 units per 400 sq ft.
Need A Flexible Coating? ArmorTrak is a rubber granulated epoxy that provides up to 20% flexibility for floors with deflection and provides a softer rubbery feel underfoot.
Our primer alone outperforms most competitors' top epoxies. The calibrated squeegee ensures the epoxy is spread to proper thickness every time — no guesswork.
Can Be Applied Over a Multitude of Surfaces
Use the Bonding Primer option to coat over existing coatings, which minimizes downtime and prep work. It's also used to coat over wood, terracotta, ceramic, or porcelain tiles. Our bonding primer ensures permanent adhesion between dissimilar coatings, wood, and smooth tile surfaces to our epoxy.
Free Swap: Just select the Bonding Primer option and we'll swap out the standard primer for the bonding primer at no additional cost.
Quarry Tile & Ceramic Tile Floors: Simply clean tiles and prime with our proprietary Bonding Primer, let dry overnight, and apply the epoxy. See the Must-Read Tab on the product page for how to easily remove oil & grease stains.
Create a Waterproof Cove Base System
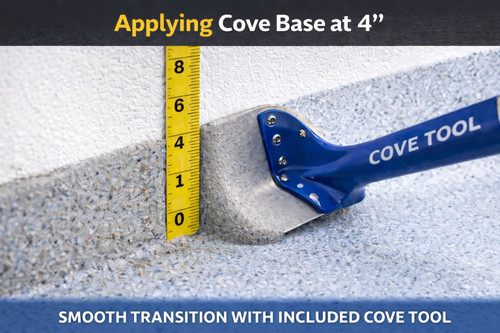
We recommend installing a cove base around the perimeter walls when doing a commercial kitchen. This creates a seamless transition from the floor to the wall — you run the epoxy across the floor and right up the cove base to form a waterproof tub. Health inspectors love it when you install a cove base forming a sanitary joint at the floor/wall junction.

The 90° wall-floor juncture becomes a germ-free radiused continuation of the floor
Cove Base Kit available in Related Products at the bottom of the page — comes complete with a 4" cove tool for easy installation.
Need 1/8" minimum thickness? Some Health Departments and industrial facilities require floors with a minimum of 1/8" thickness. Our Self Leveling Urethane Cement can be applied up to 1/4" thick and meets all building and health codes. Easily applied with squeegee and roller unlike trowelled systems that required skilled application. Optional acid resistant and military grade ultra-wear topcoats provide an indestructible floor for just about any commercial or industrial food application. Outperforms sealants used on troweled quartz flooring.
Commercial Kitchen Epoxy Flooring — Common Questions
We manufacture these systems, and before we sold them we spent decades installing food service floors across the NY Metro area. Every rep on our support line has put them down in a working kitchen
Is epoxy flooring good for commercial kitchens?
Yes — provided it is a true industrial-grade epoxy. A seamless epoxy floor has no grout lines for grease and bacteria to hide in, stands up to hot oil, caustic washdowns and dropped pots, and is the surface health inspectors prefer to see. What fails in kitchens is the wrong epoxy: water-based, "high solids" and cycloaliphatic products lack the hardness and adhesion for daily food service abuse.
Our commercial kitchen system uses a high-performance primer under an extra-thick, chemically hardened topcoat with a Shore-D hardness rating well above a construction hard hat. Very little can damage it not even heavy forklift traffic.
What is the best flooring for a commercial kitchen?
A seamless resinous floor — industrial epoxy for most kitchens, urethane cement where code calls for minimum of 1/8" thickness or if the floor is subject to constant hot water and steam exposure. Quarry tiles crack and its grout joints harbor bacteria; vinyl and sealed concrete can't survive hot oil and degreasers. Epoxy gives you a monolithic, waterproof surface that cleans in one pass.
Add a cove base at the walls and a non-slip additive on the floor and you have the complete setup health departments look for.
Does epoxy flooring meet health department and USDA requirements?
Yes. Our commercial kitchen epoxy and urethane cement systems are USDA compliant and approved for all food service applications. Health codes based on the FDA Food Code require floors that are smooth, non-absorbent, durable and easily cleanable — a seamless epoxy floor checks every box, and a floor-to-wall cove base removes the 90 degree corner inspectors flag most often.
Some jurisdictions also require a minimum 1/8" thickness; see the urethane cement question below.
How much does commercial kitchen epoxy flooring cost?
Contractor-installed commercial kitchen epoxy typically runs $6 to $15 per square foot. Our complete DIY commercial kitchen epoxy system starts at $929 with free shipping — roughly a 75% savings. The kit ships turnkey with primer, hardened epoxy topcoat, all the proper application tools, so that first-time applicators get contractor-grade results at a fraction of the cost.
Floors over 1,500 sq ft qualify for volume pricing — call 866-532-3979 or request a quote.
Is epoxy flooring slippery when wet in a kitchen?
Bare high-gloss epoxy can be slippery when wet, so every kitchen floor should get a non-slip additive. Our heavy-duty non-slip additive mixes into the epoxy or is broadcast into the wet coat and back-rolled, leaving a textured surface that grips even under grease and washdown water. We recommend 3 units per 400 sq ft.
For floors that never dry out — protein processing, dish pits with standing water — see our Industrial Textured Non-Slip Coating.
Can you put epoxy over quarry tile in a commercial kitchen?
Yes. With our proprietary Epoxy Bonding Primer you can coat directly over quarry tile, ceramic and porcelain tile, existing epoxy, paint and even wood floors — no tear-out. Clean and degrease the tile, apply the bonding primer, let it dry overnight, then apply the epoxy system as normal.
Select the Bonding Primer option on the product page and we swap it for the standard primer at no charge.
Can epoxy floors handle hot oil and thermal shock?
Our commercial kitchen epoxy withstands hot oil splashes up to 350°F, repeated caustic washdowns and heavy chemical exposure, and the formulation is self-extinguishing. For areas hit with constant boiling water, steam cleaning or fryer dumps, urethane cement is the better choice — it is engineered specifically for thermal shock and cycling.
Standard water-based and "high solids" epoxies soften and delaminate under this kind of heat — one of the main reasons cheap kitchen epoxies fail.
Do commercial kitchens need a cove base?
Yes — we recommend a cove base on every commercial kitchen project, and many health departments require it. A cove base replaces the 90° floor-to-wall corner with a radiused, seamless curve, so grease, food particles and washdown water can't collect where a mop can't reach. The epoxy runs across the floor and up the cove for one continuous waterproof surface.
Our Cove Base Epoxy Kit includes the liquids, aggregate and a 4" cove tool.
Epoxy or urethane cement — which one does my kitchen need?
Use the commercial kitchen epoxy system for sound concrete or tile in a typical kitchen. Use urethane cement when your building or health department requires a minimum 1/8" seamless floor, the concrete is badly cracked or pitted, or the area takes constant thermal shock. Our Self Leveling Urethane Cement goes down 1/8" to 1/4" thick with a gauge rake and turns a deteriorated slab into a monolithic, code-compliant surface.
Broadcast sand or aluminum oxide into the slurry for texture, then topcoat with our military grade urethane epoxy topcoat or our Novolac Acid & Chemical resistant topcoat in the color you want.
How long does epoxy flooring last in a commercial kitchen?
Properly specified and prepped, our commercial kitchen epoxy lasts about five times longer than standard epoxy floors — many years of daily food service without recoating. Longevity comes down to four ratings: high adhesion (ours cannot be separated from top layer of concrete), hardness rating (ours has the highest rating), impact resistance (up to 160 ft/lbs) and abrasion loss rating (ours is lowest in the industry). Products weak in any one of these are the floors that get redone every couple of years, causing disruptive downtime. Our epoxy flooring is designed to eliminate that issue. You'll most likely be changing kitchen equipment before recoating our floor.
Our Fast-cure primer option keeps kitchen downtime to a minimum during installation — see the product page for cure and return-to-service times.
Wet Environments & Large Floor Projects
Wet/Marine Environments: For floors in meat, poultry, seafood processing plants, or car washes, see our Industrial Textured Nonslip Floor Coating — purpose-built for constantly wet conditions.
Floors Over 1,500 sq ft: Call 866-532-3979 or Request a Quote for volume discount pricing.
Questions About Your Kitchen Floor Project?
Every commercial kitchen is different — we'll help you from start to finish with expert advice and the right system for your facility, traffic patterns, and health code requirements.
Talk to a food prep floor expert at 866-532-3979 — info@armorgarage.com or Request a Quote for project pricing. We also provide unlimited tech support 7days/week if and when you need it.
Coverage is dependent upon application and the porosity of your concrete. You will get 20-25% more coverage going over quarry tile or previous coating. We always recommend a 10% safety factor when ordering no matter what the surface is. Concrete can be like sheetrock sometimes and just soak in the coating like a sponge. We provide ample product in each of the kits but its still a good idea to have a little buffer.

Epoxy Coating Color Chart
Click any color to enlarge
The floor should be free and clear of all dirt, oil, or grease. Acid etch or diamond grinding with the Floor Prep Machine from Home Depot or a rented Industrial Diamond Grinder is recommended. All oil and grease stains must be removed before applying to kitchen floor epoxy. Clean stains with Liquid Tide or Dawn Dish Detergent scrubbed in with straight muriatic acid, let sit 5 minutes and rinse well. Several applications may be needed to remove stubborn stains. Neutralize the floor with a TSP washdown. When water does not bead up on stain or turn rainbowish blue is when the stain has been removed. If oil cannot be cleaned from floor, prime floor with our Oil Primer.
Once floor is clean and dry, mix primer (color coded and labeled Primer) in a 1:1 ratio with supplied mixer until the color is uniform, about 2-3 minutes on medium speed. IF YOU ARE IN A LOW VOC STATE YOU WILL RECEIVE THE LOW VOC PRIMER WHICH IS 4:1 MIX RATIO. Do not mix on high speed. Use calibrated mixing containers to get an accurate mix of the Part A & Part B. Then pour mixed primer into roller pan and roll onto floor with supplied lint free rollers as if you would regular paint. Our primer is really a high performance epoxy that we thin down a little so that it soaks into the lsab for permanent adhesion so working time is similar to the epoxy about 30-40 minutes. Do not mix more than you can apply in about 25 minutes. We recommend mixing 1 gallon combined part A & B per person rolling. If mixing 2 or more gallons, once mixed seperate the mix into separate pails for each person this will slow the curing process down.
Let primer dry to the touch (5-8 hours) but no longer than 24 hours. Always do a thumbprint test, press your thumb into the coating to see if it leaves a thumbprint, no print, good to go, if you see your thumbprint in the coating you need to wait a little longer.
Next, mix the epoxy (color coded differently and labled Epoxy) in a 2:1 ratio of Part A to Part B. Do not mix all the epoxy at once, this is not like store bought epoxy and the more you mix the faster it cures. Mix one gallon of epoxy for each person rolling. After mixing the epoxy pour from mixing bucket directly onto floor in a left to right bead. Using the supplied notched squeegee spread the epoxy up and down, then using a roller backroll over the squeegee marks spreading and evening out the epoxy. If using the Nonslip material disperse into the wet epoxy after squeegeeing and back roller it. Let dry overnight before light use and 24-48 hours depending on temperature and humidity for heavy duty traffic use. The warmer the floor the faster to full cure.
If coating over a porcelain, ceramic or quarry tiled floor you must clean the tile and grout thoroughly and apply the Bonding primer option, let dry overnight then apply the epoxy. If applying over existing coating, ensure coating is still adhered to the floor properly, sand lightly with 100 grit to clean and rough up and then apply Bonding primer.
For applications where downtime is critical use the Fast Dry Primer option. Allows Priming & Coating in same day.
Many uncoated kitchen and food prep floors have some sort of oil & grease contamination. Usually this can be remedied by scrubbing Muriatic Acid and Liquid Tide into the stains. Let it sit for 5 minutes and then rinse well. it may take several times to fully remove the stain. Once cleaned you must neutralize the area with some TSP powder that you simply sprinkle on, scrub in and rinse.
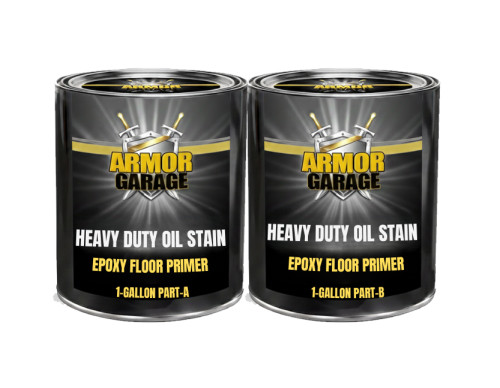
To test if you removed enough of the oil & grease to apply the epoxy coating simply sprinkle some water on the stain after it has dried from cleaning. The water should soak right in and should not bead up and turn to a bluish rainbow color. If unable to fully clean these areas we strongly suggest you use our Oil Stain Primer that is engineered to bond with oils & grease in concrete.
For going over VCT Tile be sure to strip the tiles clean and choose the Bonding Primer Option. We will switch out the standard primer for two coats of the Bonding Primer.
PLEASE NOTE that due to recent changes in VOC laws by the EPA certain states require the 'Low VOC' version. The Low VOC version of the primer is a 4:1 mix ratio, rather than 1:1 mix ratio. Current states that these laws apply to are CA, CT, DE, IL, IN, MD, MA, ME, NH, NJ, NY, OH, PA, RI, VA, KY and all of Canada. Orders shipping to these states require that the No Odor/Low VOC Option be selected for the size kit you need in the Primer Drop Down Box, orders to these states that have not selected the No Odor/Low VOC option will be manually adjusted with the correct price when your order is processed. The Fast Dry Primer meets the Low VOC requirements and is very low odor also.
Related Products