


Indoor Epoxy Floor Coating For Wood, Metal & Tiles
Complete 3-Layer kit bonds to any indoor surface—wood, metal, porcelain, ceramic, VCT tile, and more
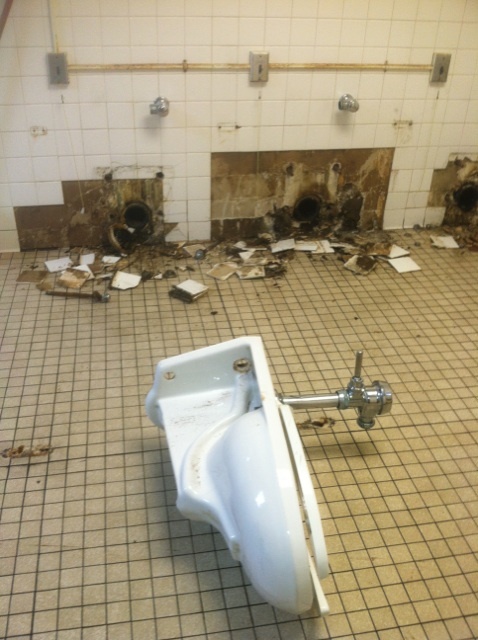
Dramatic Commercial Bathroom Transformation
Universal Indoor Floor Coating System
Unique epoxy coating kit for any indoor floor surface. Our proprietary bonding primer bonds permanently to porcelain, ceramic, terracotta, travertine, VCT tiles, wood floors, composite floors, metal surfaces, plastic, and fiberglass.
Now Available: Flexible Epoxy Version for floors with higher than normal deflection. This allows you to coat floors that previously couldn't be coated due to hard epoxy cracking—opens up entirely new applications!
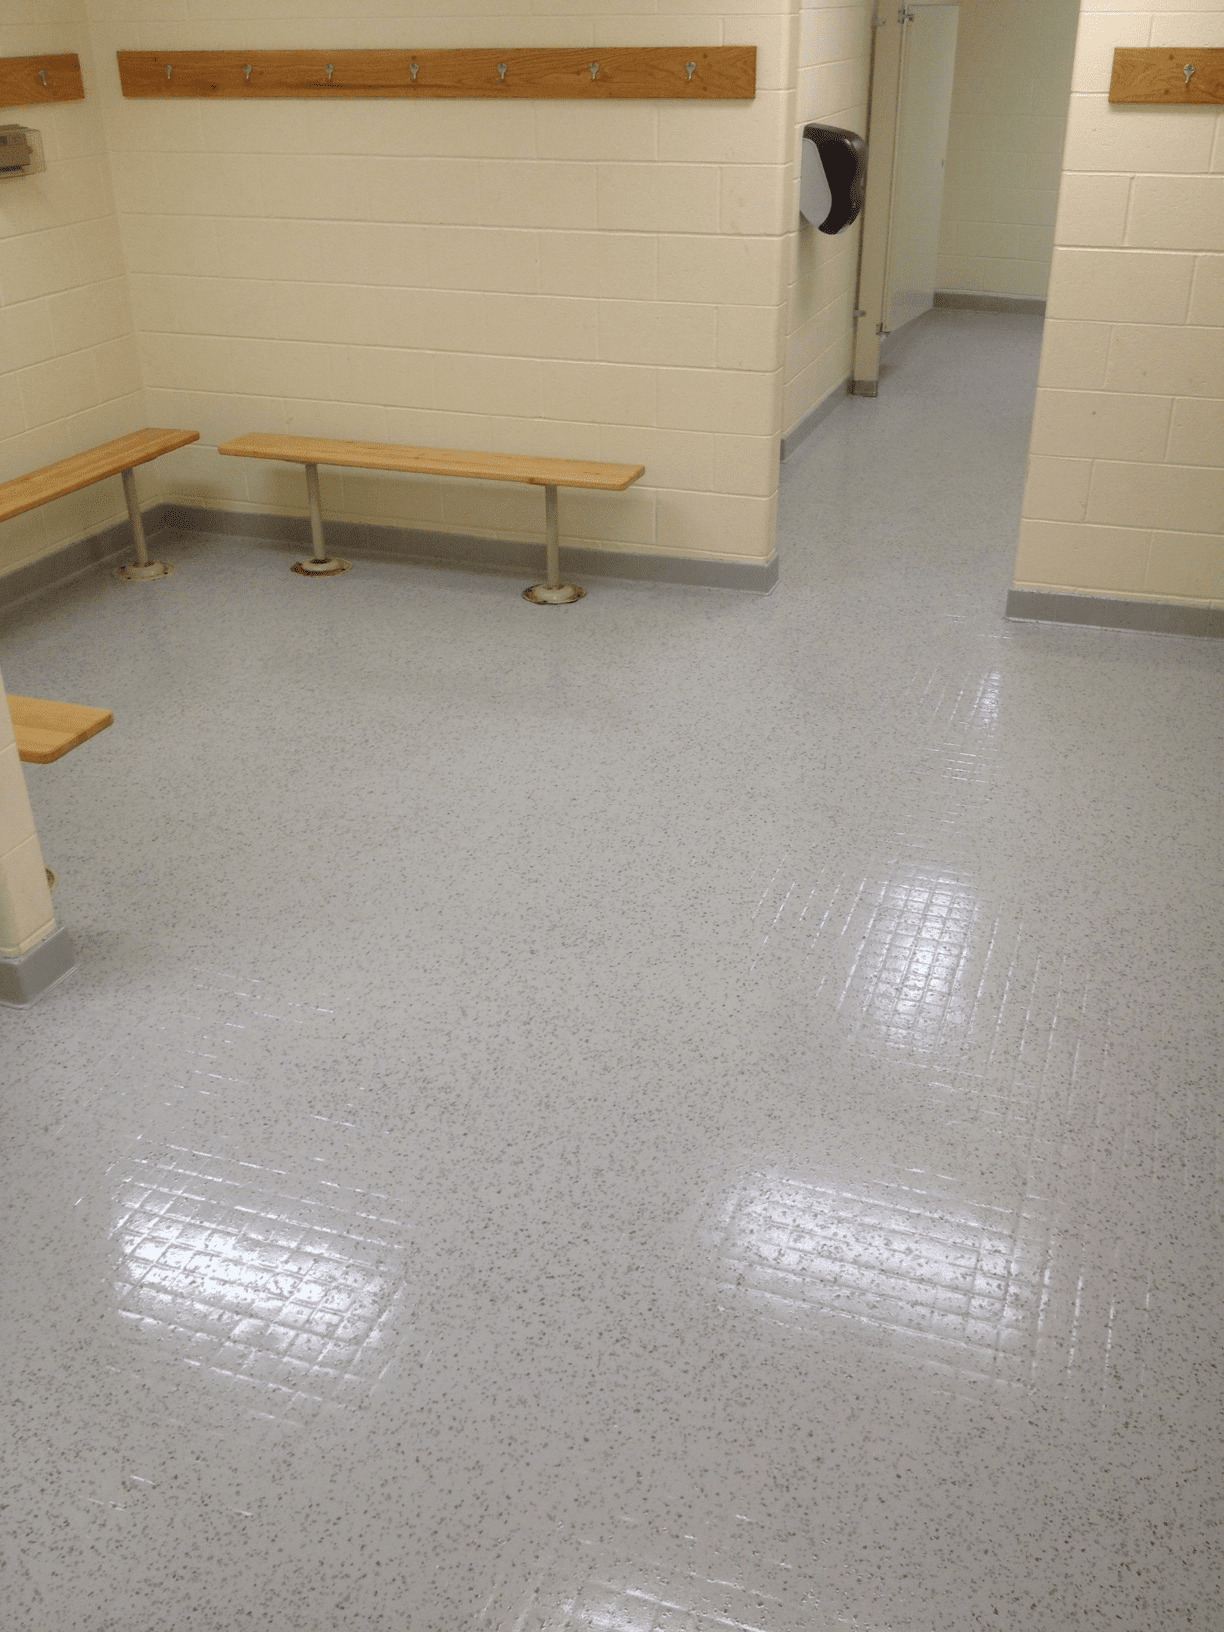
Ideal for Locker Rooms & Public Bathrooms
Transform slippery, contaminated tile surfaces into clean, sanitary, easy-to-maintain floors. Old ceramic tiles can be slippery and nearly impossible to keep clean when grout lines become contaminated.
Eliminate costly downtime by not having to retile your floor. Our military-grade epoxy goes right over existing surfaces—even over old failing epoxy that's peeling and worn.
10x Longer Life
Our military-grade epoxy outlasts previous coatings by a factor of 10
Power Washable
Floors and walls can be power washed without worrying about damage
No Retiling Needed
Save thousands by coating over existing tiles instead of replacement
Sanitary Surface
Non-porous finish eliminates grout line contamination issues
8,000 Sq Ft Banquet Hall — First-Time Installers
This entire 8,000 square foot banquet hall floor was coated over existing tile by the owners — who had zero prior epoxy coating experience. No retiling, no contractors, no downtime. Just our complete kit and phone support.
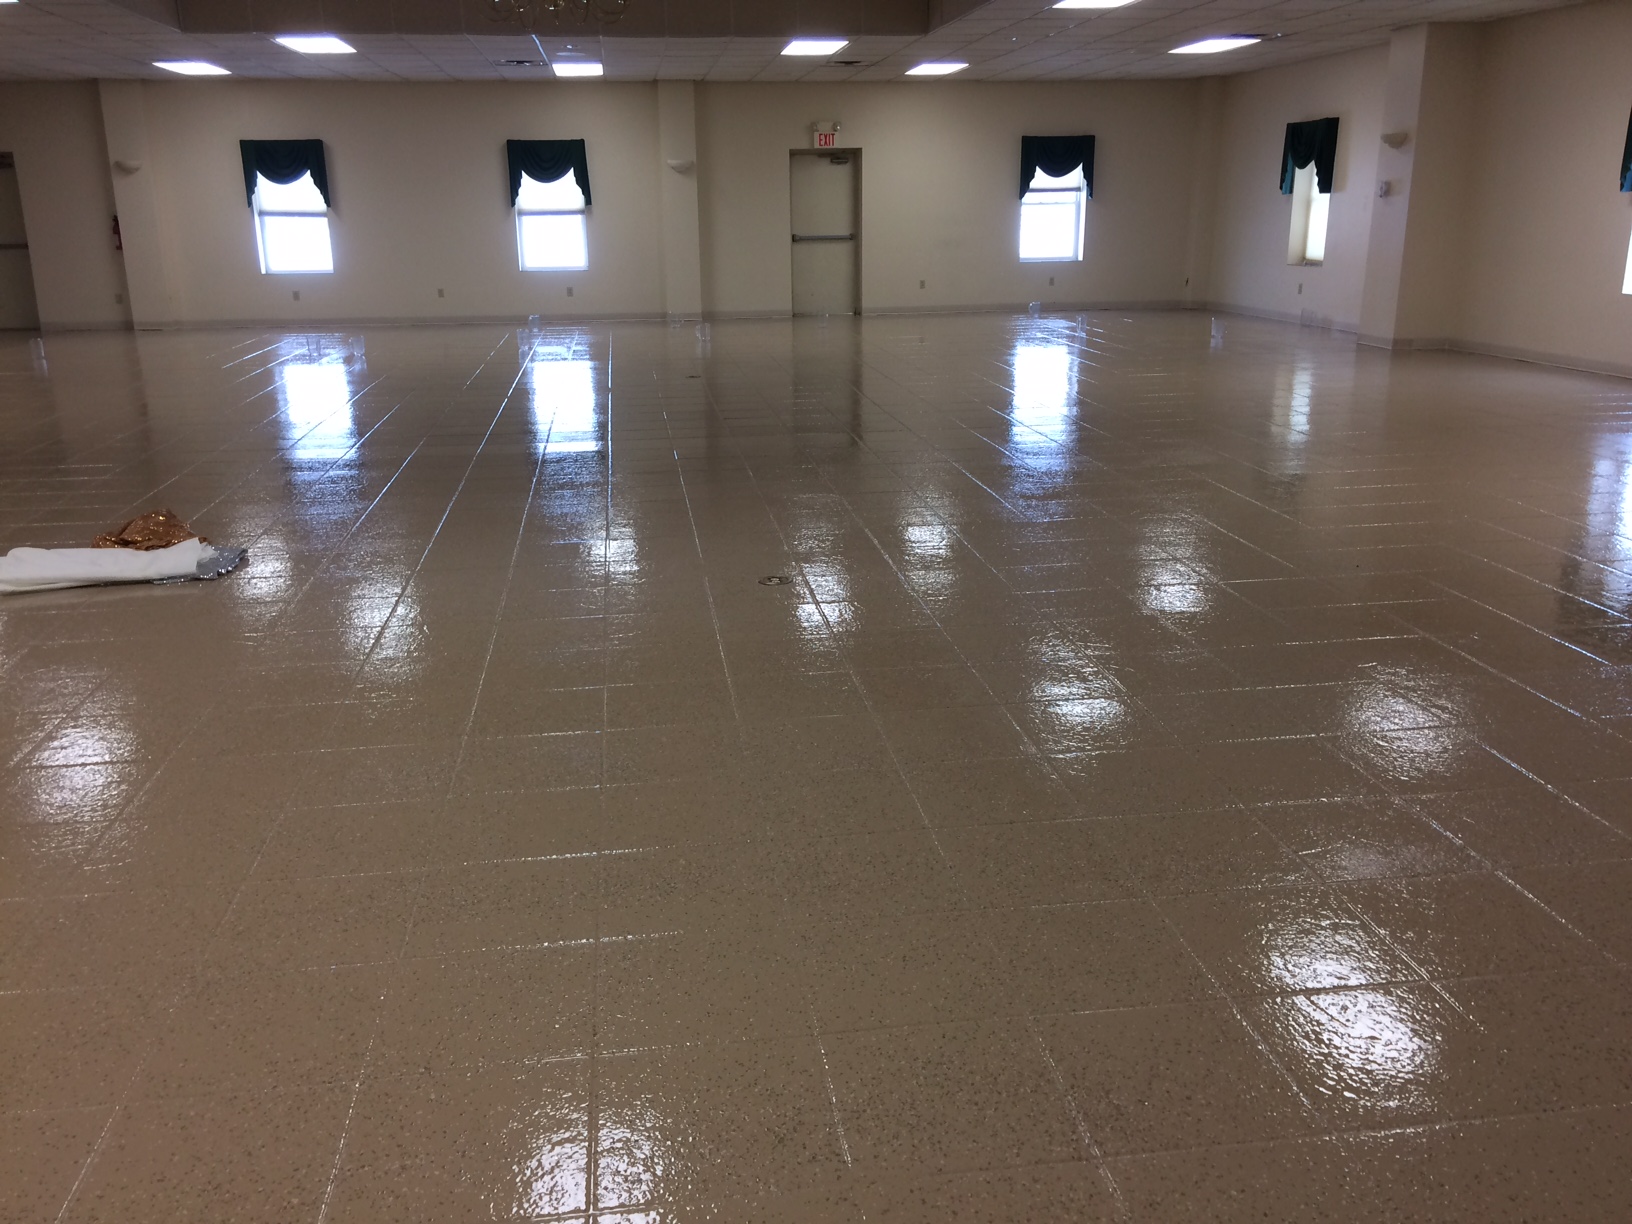
Proof that our system is truly DIY-friendly — even at commercial scale.
Complete Kit Includes
Bonds to All Indoor Surfaces
Exceptional Durability
Not water-based! Made to last up to 10 years with standard topcoat and 15–20 years with military-grade topcoat before refreshing with a new topcoat layer.
Military Grade Topcoat
Chemically hardened coating for high-traffic areas—handles the most abusive environments. One coat application.
Standard Heavy Duty Topcoat
Two-coat system for light traffic areas—excellent durability at a lower cost.
For high-traffic areas and maximum protection, choose the military-grade topcoat. It's a chemically hardened coating that can handle the most abusive environments. For light traffic, the standard topcoat provides excellent protection.
Special Application Notes
VCT Tile Preparation:
If coating over VCT tile, lightly sand with a floor buffer and 100-grit paper for optimal adhesion.
Asbestos Tile Encapsulation:
DO NOT sand asbestos tiles. We recommend thorough cleaning with an etching solution (available at home improvement stores). Once cleaned, asbestos tiles can be safely encapsulated with this epoxy system—saving you thousands on costly hazmat removal projects.
Hiding Grout Lines:
To fill grout lines, order one set of Extra Thick Epoxy for every Tile Coating Kit. Apply with a flat squeegee to fill grout lines first. Note: Filling grout lines requires more material than expected depending on depth and grout type. Contact us to discuss your specific project.
Decorative Finish Options:
Add colored flakes to the epoxy for a terrazzo-type finish. Choose from multiple flake color options when ordering.
Made Right So You Do It Once!
When you need to get the job done right the first time because time is of the essence, ArmorGarage has a proven track record in helping you get the job done fast with the longest lasting performance.
Need expert guidance on coating over old tile or wood floors? Have a large project an need discounted pricing?
Tile & Wood Floor Epoxy — Application Instructions
Primer + Epoxy + Optional Topcoat — Complete step-by-step guide for professional results
Surface Preparation
All surfaces must be clean and dry, free from grease, wax, oil, polish, loose paint, dirt, rust, or other contamination. Clean with a strong abrasive detergent, rinse well, and allow to dry. Scrub moldy or mildewed surfaces with bleach and rinse well. Wipe down the surface with Xylene. Do not use mineral spirits or turpentine — they leave oily residues.
Tile, Glazed Block, Brick & Porcelain
Remove old paint and debris. Repair or patch any broken or damaged areas. Clean away wax, polish, grease, oil, and contaminants with strong abrasive detergent. Wipe the surface with Xylene. For maximum adhesion, scuff sand with carbide sandpaper or etch with muriatic acid (2 parts water to 1 part acid).
Apply the primer and allow to dry for 24 hours, then apply the epoxy. Not recommended for sinks, tubs, or shower areas where continuous water or hot water can be present.
VCT & Hard Glossy Surfaces
Roughen the surface with a floor buffer using a black pad or silicon carbide sandpaper before applying the primer. Two primer coats are required for VCT. Allow first coat to dry to the touch, then apply second coat perpendicular to the first.
Wood Floors
Lightly sand to remove any mil finish or other surface films before priming.
Concrete
Grind with diamond grinder or Floor Prep Machine (available at Home Depot), or acid etch with 3 parts water to 1 part muriatic acid. Sprinkle solution onto surface, let sit 5 minutes, then rinse. Repeat if necessary. Scrub in 1 lb TSP per 1,000 sq ft and rinse thoroughly to neutralize the surface. Let dry 24–48 hours.
Previously coated concrete: Pull test by scoring a 12” x 12” square with a razor, cover firmly with Gorilla Duct Tape, then rapidly pull off. If more than 20% of coating comes off, fully remove via Floor Prep Machine or diamond grinder with 25-grit bits.
Flexible seams & caulking: Do not paint over flexible seams or soft caulking with the primer. Fill cracks or spalls with Armor Crack & Joint Compound and allow to cure overnight before priming. Apply any needed caulking after painting. Always caulk edges or seams that can trap moisture.
Exterior applications: Where high water contact is expected or where moisture/dew may accumulate, use our Ultra Fast Dry Epoxy which is UV rated.
Primer Application
Mix & Apply Primer
Mix well in can. Apply with synthetic fiber brush or 1/4” nap synthetic roller (included). Surface and air temperature should be between 35°F and 100°F.
Dries to touch in about 2 hours under standard conditions (77°F / 50% R.H.). Thicker coats will take longer. Coverage: approximately 400 sq ft per gallon.
VCT requires two primer coats. Allow first coat to dry to the touch, then apply second coat perpendicular to the first if possible.
Do not paint in direct sun or on a hot surface. Stop application two hours before heavy dew or rain. If possible, plan your painting to avoid heavy rain for the first 24 hours of curing.
Clean-up: Use Xylene or equivalent.
Allow 24 hours for primer to cure before applying epoxy.
Epoxy Application
Indoor use only. Be sure to allow 24 hours for primer to cure before applying epoxy.
Kit Contents
300 SF kit: 1 × 1.5 gallon set of epoxy. 600 SF kit: 1 × 3 gallon set.
Mixing
Mix ratio is 2 Parts A to 1 Part B.
DO NOT MIX ALL THE EPOXY AT ONCE. Mix each 1.5 gallon set in 2 batches. Mix each 3 gallon set in 3 batches. Use measuring containers to pour out portions of Part A and Part B.
Accurate measurement and mixing is required for proper cure. Improper measurements or mixing will result in tacky spots which are not covered by warranty. Pour measured amounts into a mixing bucket, using a stirring stick to scrape material from measuring containers. Mix with the included jiffy mixer in a power drill on medium speed for 2–3 minutes, moving the wand up, down, and all around the sides to ensure a complete mix.
Application
Pour a bead of epoxy from left to right and spread with the included squeegee, then back-roll the product out further in an even coating. Do not apply too thick — it is not necessary to apply an overly thick coat. 3 gallons should cover approximately 600 sq ft. Hard-to-reach areas and vertical surfaces may be coated by brush.
Work time is 30–40 minutes. Do not leave mixed epoxy in the mixing bucket or unattended. Premature hardening is not covered by warranty. Repeat for each batch until done.
Color Flakes (Optional)
Sprinkle flakes into each wet epoxy section. Using the included spike soles, toss small amounts into the air and allow them to fall randomly while walking in the wet epoxy. Avoid handling or tossing too many chips at once to prevent clumps and blotches.
Leave a wet edge of epoxy without flakes to facilitate overlapping from the next section. All sections will self-level and blend together to form a seamless surface.
Tip: See the "How To Prep & Paint Your Floor" page on our website for helpful tips on applying flakes properly.
Topcoat Application (Optional)
Allow epoxy to cure 12–20 hours before applying topcoat. Epoxy should be hard to the touch without leaving any fingerprints. Apply topcoat within 20 hours of epoxy.
Apply Topcoat
Mix non-slip additive into the can and stir continuously to keep particles suspended. Pour product from can into rolling pan and roll on like conventional paint.
Military Grade Topcoat (Red Label Can)
One coat only. For heavily trafficked and/or public areas, this is the recommended topcoat.
Standard Heavy Duty Topcoat
Two coats required. Apply the included non-slip additive to the topcoat in the second coat. Stir can frequently to keep non-slip suspended.
Non-slip additive is optional but recommended. The topcoat is non-porous and very slippery when wet without the additive. If not using it, clean up any spills immediately.
Need Help With Your Floor Project?
Our team can help you select the right system for your tile, wood, or concrete floor.
Call: (866) 532-3979 | Email: info@armorgarage.com
Please note that when using this product that the Primer, Epoxy and Standard Topcoat have no odor. If you need the Military Grade Topcoat please be advised that there is an odor with this coating so be sure to have adequate ventilation. We also strongly recommend you use the supplied nonslip to avoid slip and falls when the epoxy is wet.
For VCT tiles a minimum of two primer coats are required, please call us when doing a VCT floor.
For wood floors any and all wax or clear coats must be sanded off first. If your floor has a lot of deflection in it we strongly suggest you choose the Flexible Epoxy version to avoid cracking. Our Flexible Epoxy offers an amazing half inch in deflection without cracking.
For filling in grout lines please note that it's not an exact science in determining how much product you will need to completely hide your grout lines. It depends on how deep the grout lines are and what type of grout was used. So best to error on the safe side rather than come up short. We recommend not filling in the grout lines to maintain the tile appearance and give the fllor some dimension.
Standard Color Chart
Click any swatch to zoom • Colors shown are approximate — request a physical sample for exact match
Custom colors available for orders of 10,000+ sq ft • Contact info@armorgarage.com or call (866) 532-3979
Perfect for applying in residential or commercial applications for coating over:
Porcelain Tiels
Cermaic Tiles
Terracotta Tiles
Travertine or Limestone
Quarry Tiles
VCT Tile
Wood
Composite Woods
Metal Objects
Plastic Objects
Restrooms
Locker Rooms
Offices
Retail Stores
Restaurants
Showrooms
Schools
Hospitals
And many other apllications, please call if you're not sure aobut your project


