


Commercial Epoxy Floor System for Larger Floors
Seamless, high-gloss, high-performance coating solution for 1,500+ sq ft floors—built for heavy traffic, chemicals, impacts, and stains.
✓ Ships FREE on palletsThe large format commercial epoxy flooring system provides a seamless, two-layer (primer + topcoat), high-gloss, high-performance coating solution for factory, warehouse, hangar, and institutional floors 1,500 square feet and larger. These coatings resist heavy forklift traffic, chemicals, impacts, and stains while delivering a long-lasting, easy-to-maintain surface suitable for high-volume commercial environments at a very economical price.
- Designed and palletized for floors 1,500 square feet or larger.
- Ideal for businesses, shops, and institutions, that want an epoxy finish without color flakes.
- Rated for warehouses, meeting halls, parts rooms, food courts, showrooms, maintenance shops, machine shops, repair shops, and hangars. Not for residential use.
- Used in U.S. Coast Guard helicopter maintenance hangars for proven durability.
Floors under 1,500 sq ft?
See our small format commercial epoxy package with the same materials and accessories.
Not sure which system?
Use the Epoxy Floor Coating Selector and let it choose what’s best for your application.
The ArmorGarage Commercial System makes it simple to epoxy coat large floors. No forms, no product matching, and no separate purchases. Just calculate your square footage, select your color, and we ship everything needed to do the job right the first time.
Ordering tip: Enter your total square footage in the quantity box. We recommend adding a 10% safety factor to account for varying concrete porosity. Every concrete floor is different!
Plus Version available: includes an extra-thick base coat for added durability. If unsure between the Commercial or Ultra Military System, choose the Plus System.
Safety Color Line Striping Kits available: includes enough material for 600 lineal feet at 4" wide. ArmorGarage Advantage: our line striping material is made with our factory-ground pigment powders, not liquid tints. This provides lines that last longer and cover in one coat, unlike liquid-tinted coatings that have bleed-through, requiring multiple coats and wear out quickly. All safety colors in stock.
LOW VOC required: CA, CT, DE, IL, IN, MD, MA, ME, NH, NJ, NY, OH, PA, RI, VA, KY, and Canada (EPA regulations).
Minimum order size: 1,500 sq ft. Custom colors: 10,000 sq ft and up.
This turnkey epoxy flooring system ships FREE on pallets and includes:
- Floor prep solution and neutralizing powder.
- Two-part 100% solids epoxy base coat that outperforms most actual epoxies (color of your choice).
- Ultra high-wear urethane-fortified topcoat with an 8mg abrasion rating, exponentially better than retail epoxies with 30mg and higher ratings.
- Mixers, mixing buckets, liners, 18" epoxy rollers, heavy-duty frames, and spiked soles.
- Micro-tubular aluminum Ultrawear nonslip additive for added grip and durability (far superior to standard grit).
- Easy-to-follow instructions and unlimited free phone and after-hours email tech support.
- Forklift and pallet jack rated best durability rating of 8mgs compared to 30mgs and higher for competition.
- Deep-penetrating base coat for permanent adhesion, cannot be separated from concrete.
- High-gloss commercial topcoat that resists abrasion and wear.
- Resistant to chemicals, acids, vehicle fluids, and road salts.
- Stain-resistant, nonstick easy-to-clean surface.
- Impact resistant, waterproof, mold and mildew proof.
- Can be applied over existing coatings using our Epoxy Bonding Primer.
Our complete system makes it easy for first-time users to achieve professional results while saving up to 80% over contractor pricing. If you can use a paint roller, you can apply this epoxy floor system.
All images shown are real installations completed by first-time users.

Ready to get started on your project?
Get expert guidance on what to order and how to apply it, quantity discounts.
For color flake finishes see Industrial Epoxy Flake Floor System or Garage Epoxy Flake Floor Kits
FAQ's
Do I have to etch new concrete?
Yes, in fact you need to etch it twice to make sure you burn out all the curing residues and then neutralize with the provided neutralizing powder. It's very important to follow this procedure to get permanent adhesion. You can diamond grind the floor with the Floor Prep Machine from Home Depot or commercial grinder which eliminates the need to acid etch. Just be sure all the dust is off the floor before you begin coating.
Is the Commercial Floor Epoxy slippery?
All our epoxy floor kits come with nonslip additive that is mixed into the final topcoat to provide a slip resistant finish. In fact we use a high tech additive that is micro tubular aluminum that acts like rebar in the coating giving it added durability and slip resistance.
Can I fill in the expansion-contraction saw cuts that were installed in my slab?
Yes you can but we don't recommend it unless your floor is at least 5 years or older. If you fill them in too soon you run the risk of having a crack show up in your brand new high gloss epoxy floor. We like to leave the control joints unfilled. Once you've epoxied the floor the control joints add dimension to the floor making them look like giant slabs of porcelain or granite if you use color flakes. Don't worry about dirt or debris getting stuck in them, once epoxied anything is easily blown out or rinsed out. But if they really bother you then fill them in with our Crack & Joint Filler. For small cracks, holes and divots use the Instant Crack Repair that lets you patch and prime right over it immediately, huge time saver! Please don't use any premixed residential grade products, caulk or silcone based products, they will crack out and ruin your floor.
How much does commercial floor epoxy cost?
For franchise company and contractor installed floors the average costs are between $5.00-$8.00 per square foot. For DIY floors you can get it done for $1.35- $2.00 per square foot and using a better quality product. It pays to do it yourself and is very easy and straight forward to install.
How long will your epoxy floor coatings last?
Although that's like trying to answer how long will a car last type of question. Since it depends on the amount of traffic and type of traffic on the floor. You can count on your ArmorGarage floor lasting and looking good for 15-20 years as opposed to 2-3 years for a typical off the shelf epoxy coating. ArmorGarage is the only garage epoxy guarantee against any effects of wear for 5 years. This means your floor still looks brand new after 5 years and most likely 10-15 years. While off the shelf epoxies wear out in 2-3 years and will have to be diamond grinded off and completely redone. While our floor somewhere between 15 and 20 years will only require a couple of hours work to lightly scuff up the topcoat and simply roll on a new topcoat to bring the floor right back to new.
Take a look at the videos on our CASE STUDIES page. There are videos of our garage floor system vs big box products, our floors after 16 years of use, side by side comparisons. If our garage floor epoxy is that much more durable you can imagine how much better our commercial duty epoxy is!
Why are ArmorGarage epoxy floors better?
ArmorGarage floor epoxy is not water based, they are pure military grade epoxies made with 100% made in America materials. They are 10 times thicker and have a much harder finish. Our military grade topcoat has an amazing abrasion loss rating of only 8mgs(the lower the number the better) as opposed to other typical epoxy coating systems that have ratings of 30 mgs and higher. That's a tremendous difference. Our coatings are hot tire proof, mold & mildew proof, road salt proof, waterproof and chemical and acid resistant. In short there is no comparison to our epoxy coatings with any other brand. See the Why ArmorGarage Epoxy Really Is Better page for additional information about this.
How long for the primer and topcoat to dry?
The primer will dry in about 5-6 hours, press your thumb into it, it should not leave a thumb print when cured. Do not let more than 24 hours pass before applying the topcoat. Topcoat will dry in 6-8 hours, again do the thumb test to be sure it's dry. Even though it's dry to the touch it is not fully cured. Once dry you can walk on it and apply light traffic the next day. Heavy traffic should be held off till the second day.
How long does it take to install your epoxy flooring?
The actual amount of labor hours is about 6-8 hours total for a 2500 sf floor. In total time from start to finish is 2 or 3 days due to dry times in between coats and letting the floor dry if you acid etch it. Grinding will save you a day or two in drying time. Once you apply the final topcoat you can put all your stuff back on the floor in about 6-8 hours, light traffic the next day and full forklift duty service in 48hrs.
Does your epoxy have a strong odor?
Our commercial epoxy has a fairly strong odor that is usally not an issue unless you are applying it in or adjacent to an occupied area. If doing a large floor where you will be laying down a lot of material all at once we would recommend a simple paint respirator. In fact it's always a good idea to use a respirator. The Low VOC version has a lower odor. Proper ventillation is always recommended also.
Is the commercial epoxy floor system USDA approved?
Yes, it is approved for use in all food prep and processing areas. When using in food production areas we recommend installing a cove base around the perimeter of the floor to form a seamless transition from floor to wall. This creates a waterproof tub like effect that makes washdowns much easier and sanitary. ArmorGarage II commercial epoxy is waterproof, mold & mildew proof and resistant to many chemicals and acids making it ideal for caustic washdowns.
See the EPOXY FAQ page for additional questions and answers.
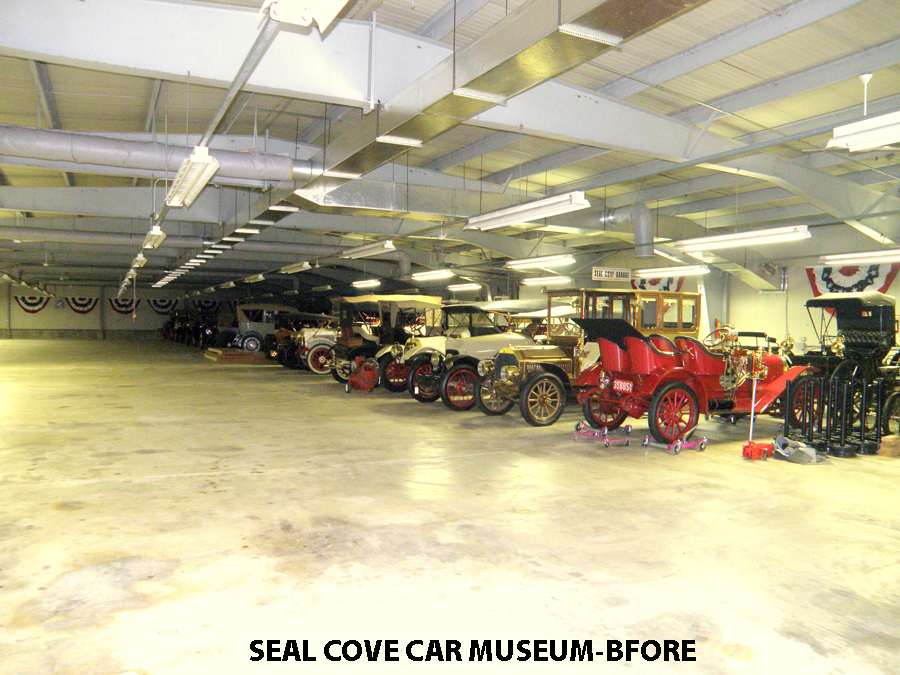
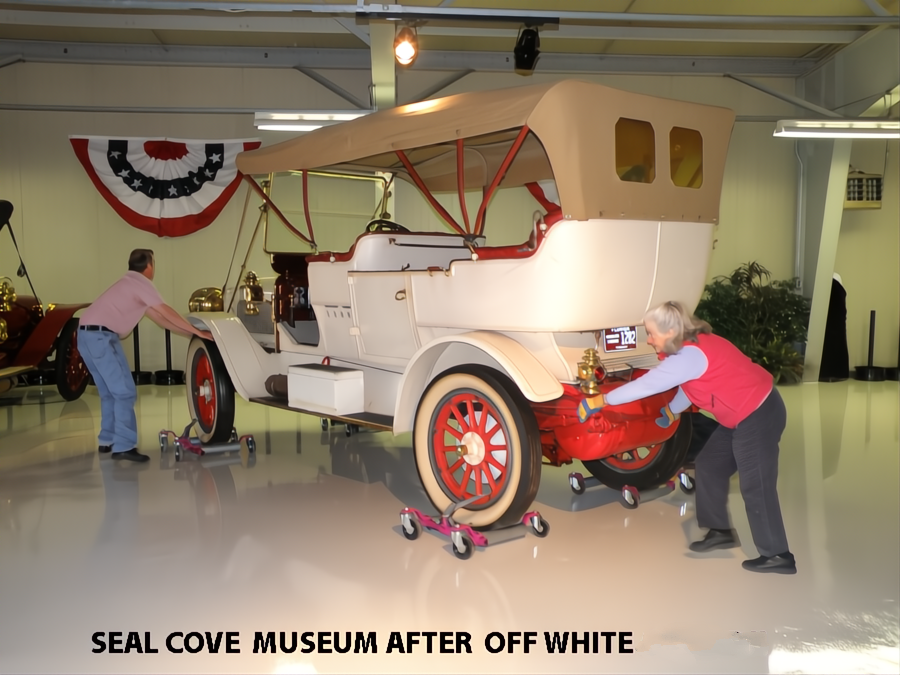
The ArmorGarage commercial epoxy floor system easily transformed this old beat up floor into a true museum showroom finish in off white. We think it doesn't get much better looking than this!
Pro Tips For Commercial Epoxy Floor Projects
These are the two most important factors when applying any epoxy floor coating—at least one you want to last more than a year or so.
#1 Critical Mistake to Avoid
Not using an abrasion-resistant urethane fortified topcoat! This is the biggest mistake you can make.
Did You Know?
ALL solids-based epoxy coatings are NOT UV stable. Without a urethane fortified topcoat, they'll yellow and turn dull quickly.
Why Our 8mg Topcoat Matters
High-quality topcoats have a much harder finish and are more expensive to manufacture than epoxies. Our topcoat has an 8mg loss rating (the lower the number, the better) based on the Taber CS-17 industry standard test.
Commonly available epoxy coatings have loss ratings of 24mg and higher, which is exponentially softer than our 8mg topcoat and not suitable for commercial applications. They're much softer because they have a completely different chemical cross-linking composition of resins and hardeners.
Cleaning vs. Etching: Understanding the Difference
Cleaning and etching are two different things but can be done at the same time:
- Cleaning gets the concrete looking as clean as new concrete
- Etching opens up the pores so the epoxy penetrates, expands as it cures, and locks in to form an unbreakable bond
Dealing with Existing Sealers
Sealers must be removed either chemically or by mechanical grinding. Test with a water splash to make sure water soaks into the concrete.
Essential Tools & Materials
- Clear plastic calibrated containers to measure epoxy liquids accurately when mixing Part A and Part B components
- Small can of Xylene (available at any hardware store) – mineral spirits will do if Xylene is not available
Setting Up Your Mixing Station
- Set up a mixing station on a tarp to avoid getting epoxy where you don't want it
- On larger jobs, one person should do all the mixing to avoid confusion with different components
- Always keep basecoat and topcoats separate
- The cans are color-coded to aid in identifying them
Crack & Divot Repair Timing
1 Crack & Joint Repair Compound: Repair cracks and divots prior to etching
2 Instant Crack Filler: Do repairs after cleaning and etching – you can apply basecoat without waiting for the repair compound to harden
Essential Reading for Success
Two critical pages every DIYer should read before starting their project:
Commercial Flooring Epoxy Application
ArmorGarage II is not like store-bought epoxy. Please read these instructions carefully for best results.
Critical: Proper Floor Preparation
Your floor preparation determines the success of your coating. A properly prepared floor ensures the epoxy forms a permanent molecular bond with the concrete.
✓ CORRECT: This is how your floor should look before coating

Notice the open, textured surface—concrete pores are clean and ready for epoxy bonding
✗ INCORRECT: If your floor looks like this, STOP and power wash/etch again!

Sealed, dirty surface will prevent proper epoxy adhesion—must be cleaned and etched
Before & After: Properly Prepared Floor

Floor grinded and etched using Home Depot floor prep machine. Oil stains cleaned with Liquid Tide and muriatic acid.
Important: If grinding your floor, still etch afterward if rinsing off grinding dust. This ensures concrete pores are clean and open for maximum epoxy bond.
Coating over existing coating? View our instructions on coating over existing epoxy. The example shows Armor Chip overlay, but the procedure is the same for any epoxy floor kit.
Grinding to Finished Product Example
Notice the grinder used below. If not using the Floor Prep Machine from Home Depot, use this type of heavy-duty grinder with new 25-grit diamond bits.


Installation Timeline
Typical 600 SF Kit Installation Time:
• 1-2 Hours: Clean & Etch
• 1-2 Hours: Epoxy Base Coat Application
• Less than 1 Hour: Topcoat Application
Step-by-Step Application
Base Coat Application:
- Mix Preparation: Mix one gallon of base coat in 1:1 ratio (or 4:1 if using Low VOC) per person rolling. For multi-person crews, designate one person for mixing.
- Pour & Distribute: Pour mixed product into individual pails for each person rolling. Mix thoroughly around the entire pail to ensure complete blending of Part A & Part B.
- Dry Time: Base coat dries in 4-6 hours. Apply topcoat when base coat is dry to the touch—should be hard and not leave a fingerprint when pressed.
Topcoat Application:
- Mix Ratio: Topcoat mixes in 2:1 ratio. Do not mix more than 1.5 gallons per person rolling.
- Add Non-Slip: After mixing Part A & Part B, gently mix in Ultrawear non-slip at one pint per 1.5 gallons of topcoat.
- Application: Use roller pan to roll out topcoat. Stir frequently to keep non-slip suspended.
- Curing Times: Topcoat dries in 6-7 hours for light traffic. Vehicle and heavier traffic requires 36-48 hours of curing.
Temperature & Weather Requirements:
• Floor temperature must be 50°F or higher during entire curing process
• Do not apply if heavy rain is forecast (light rain is acceptable)
Fast Dry Version Instructions
For the Fast Dry version, you will receive primer with 1:1 mix ratio and pigment packs:
- Add Pigment: Mix pigment packs into the Part A can until color is uniform.
- Mix Primer: Mix approximately 1 gallon of primer (1/2 gal of A & 1/2 gal of B) for each person rolling. Use measuring containers to maintain proper 1:1 mix ratio when using partial cans.
- Work Quickly: Do not mix more than you can apply in 15 minutes when using fast dry version.
- Dry Time: Allow 2-4 hours for primer to dry hard to the touch before applying topcoat. Primer should not leave a fingerprint when you press your thumb into it.
Need Help? We're Here 7 Days a Week
If you have any questions about floor preparation or epoxy application, contact us anytime.
After hours email: support@armorgarage.com
Someone is on standby 7 days a week to help you.


