


ArmorGarage Industrial Epoxy Flooring System
Professional-grade 3-layer solid color floor coating. The highest level of durability in a beautiful high-gloss finish — over 30 million square feet sold.
Free Shipping • USDA Approved • Military Grade 4mg Abrasion RatingThe ArmorGarage Industrial Difference
Conventional floor enamels are 2–3 mils thick. Water-based epoxies are 3–4 mils. Most other epoxies are under 10 mils. Our system is 25–30 mils thick with an industry-best 4mg abrasion rating — that’s why it lasts 10–15+ years while others fail in 1–3.
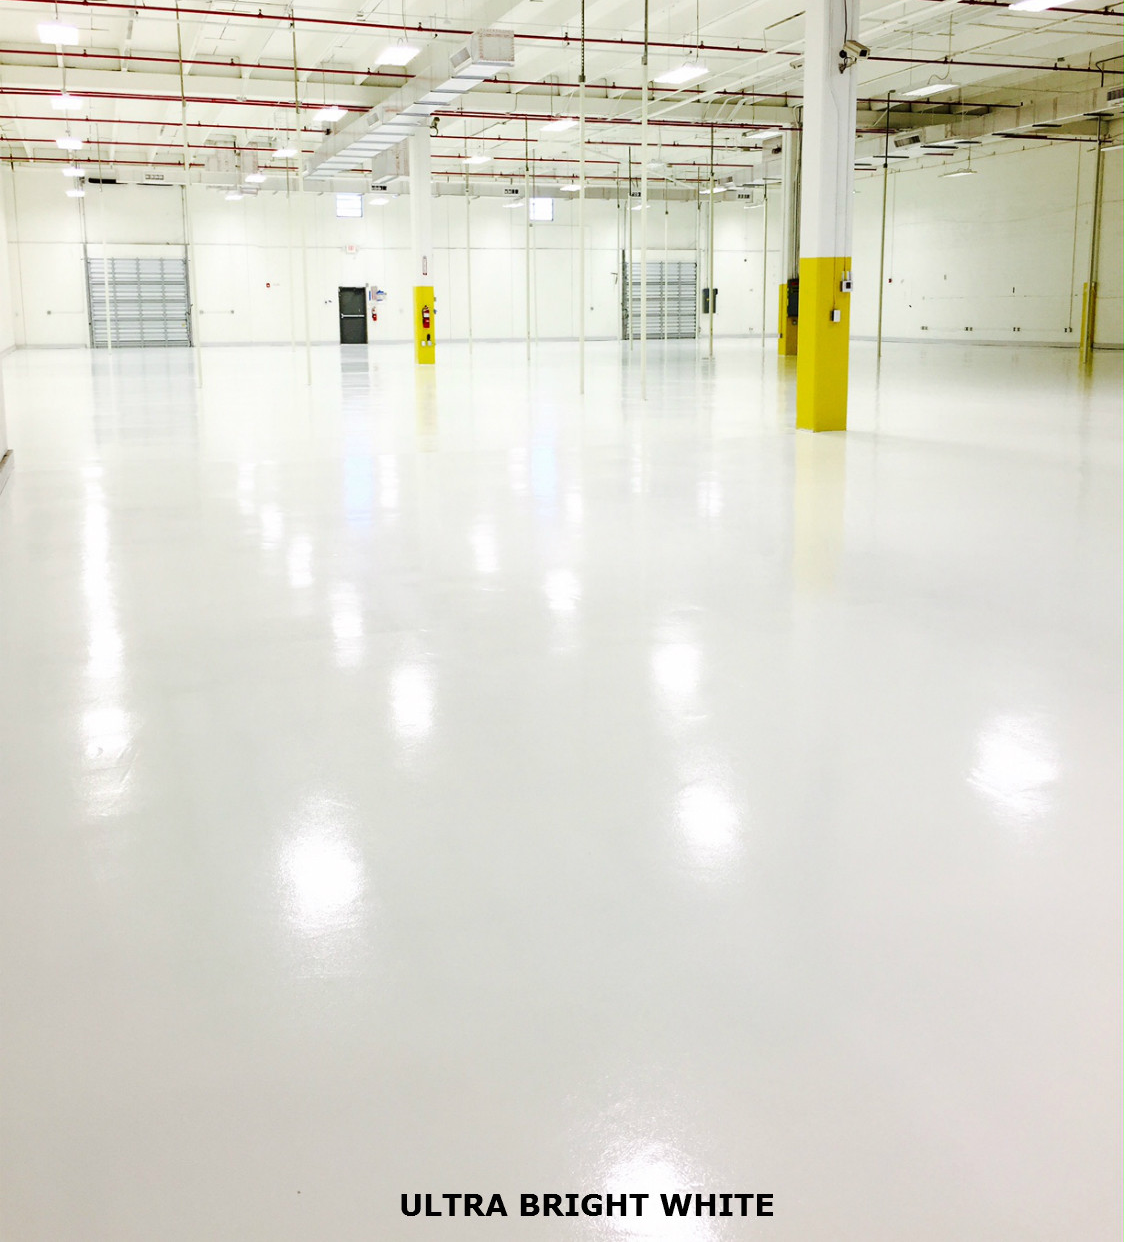
Extra Heavy Duty Epoxy Floor Coating System — Rated for Commercial, Industrial & Military Use
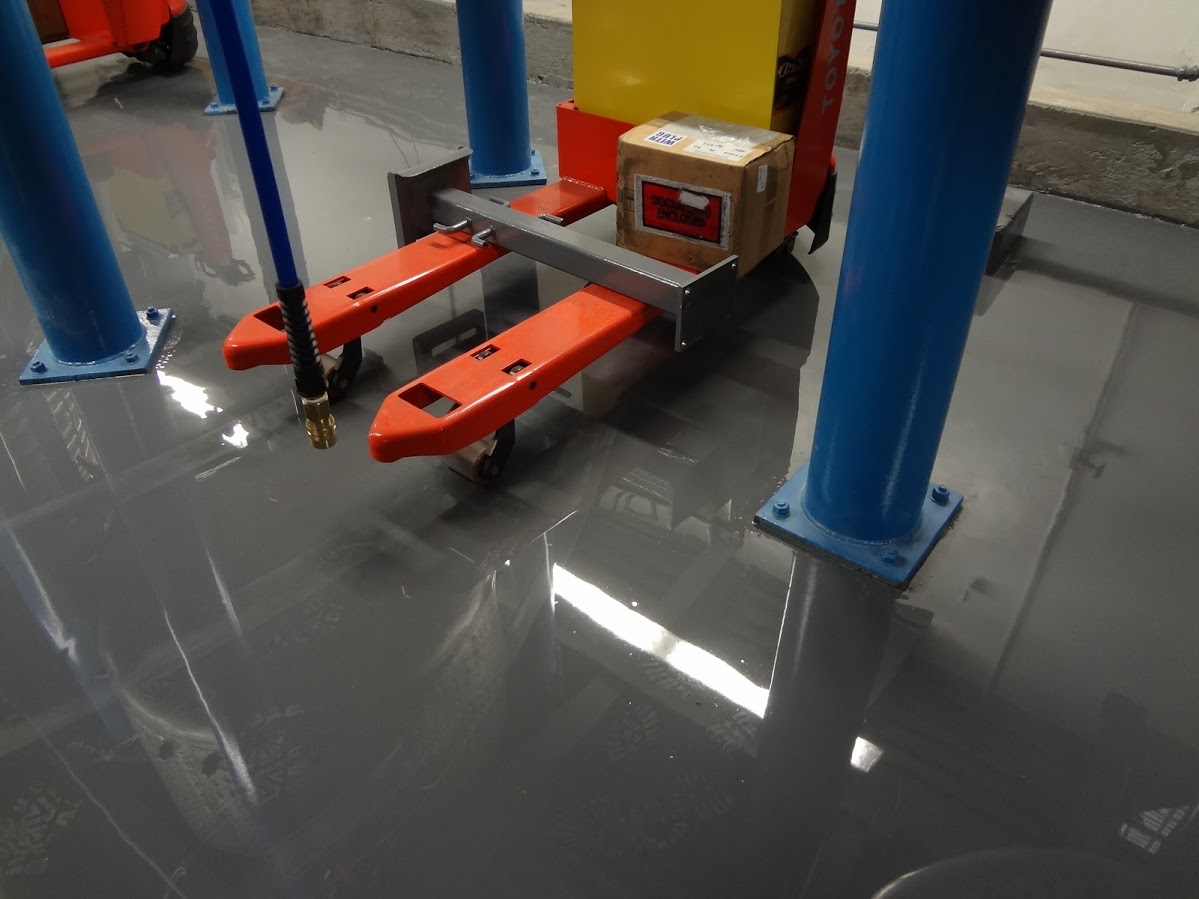
Built to handle daily pallet jack and forklift traffic without wear paths or surface damage.
Everything’s Included — Nothing Else to Buy
Coating System
• Premium solids-based two-part epoxy base coat for maximum adhesion
• 100% military grade solids high build two-part epoxy middle layer
• Ultra-high wear military grade urethane topcoat as the final layer for the highest level of protection and durability
• Micro-tubular aluminum non-slip additive
• All materials in sufficient quantities to do the job right the first time
Prep & Tools
• Floor prep etching solution & TSP neutralizer
• 9” lint-free epoxy rollers, mixer, spike soles, calibrated squeegee for applying epoxy at correct thickness, mixing bucket
• Clear & Easy to follow instructions + unlimited phone and after-hours email support
• Free shipping included
Package size: Suited for floors up to 1,500 sq ft. For larger floors see Large Format Package.
Why This System Outperforms Everything Else
Perfect For
Walls too: Vertical wall surfaces can be coated with the Ultra Wall Epoxy Paint version without drips or runs. Curbs up to 12” high can be coated with this.
Good to Know
Coating over existing? Select our proprietary Epoxy Bonding Primer in the primer version dropdown. We’ll substitute it for the standard primer at no charge.
Want a flake finish instead? See our Flake Floor Epoxy Kits for decorative chip or granite-style finishes.
Wood floors: This system works on concrete or wood floors. Please select Bonding Primer when applying on wood floors and sand any Mil finish off.
LOW VOC VERSIONS REQUIRED IN: CA, CT, DE, IL, IN, MD, MA, ME, NJ, NY, OH, PA, RI, VA, KY, and all of Canada. The Low VOC version has the same performance — just less odor. Orders shipping to these locations require the Low VOC option in the Size dropdown.
Not sure you need industrial-duty? See our Technical Resource Hub for spec sheets, instructions, and comparisons. Pro Tip: When it comes to epoxy flooring, it’s always better to over-rate your system than under-rate it.
Related Products & Resources
Ultra Wall Epoxy Paint Flake Floor Epoxy Kits Large Format Package All Epoxy Floor Coatings
Free Shipping • Complete Turnkey System • Expert Support
Minimum order: 500 sq ft. Ready to get started?
Call: (866) 532-3979 | Email: info@armorgarage.com | Request a Quote

Armor Military Industrial Epoxy Flooring
Armor Military Industrial Epoxy Flooring is sold as a complete packaged system for your convenience. Simply enter the square footage of your floor and we will calculate and package everything you need. Minimum order size for this product is 500 sq ft and in 100 sq ft increments after that, ie: 500, 600, 700. Please average up to the next 100 foot increment as a margin of safety due to different concrete porosity, ie: if your floor is 545 sq ft, enter 600 into Qty Box. We are very conservative in our coverage ratios and provide plenty of material unlike our competition, we still recommend that you have a minimum 10% safety factor since every floor has a different porosity and texture and will absorb the product differently.
Also note that Beige and high pigment colors such as Yellow, White, Bright Red, Brown and Black will yield even less coverage and we therefore recommend a 15-20% safety factor.
For floors with a very rough finish such as a broom finish or that are pitted we recommend you call us to discuss since you will have to do an extra layer of the extra thick epoxy.
For jobs larger than 5000 sq ft call or email for quantity price discount. When using either the oil primer or the metal & wood primer select the "No Primer" option in the selection box above. It is not necessary to use the standard primer with one of these primers. It will also ensure you'll get the best possible adhesion between the floor and our epoxy.
How to Apply Military-Industrial Epoxy Flooring
Complete step-by-step guide from surface prep through topcoat — primer, epoxy, and military-grade finish
Versatile Application
Ultra Epoxy Flooring can be applied onto just about any type of floor — concrete, wood, or stone — and can also be applied over existing paint. For wall applications, see Industrial Wall Epoxy Paint.
Waterproof Cove Base Option: Use this epoxy in conjunction with our Cove Base Kit between the floor and wall to create a 100% waterproof and sanitary installation — as required in commercial kitchens and food prep areas. A cove base forms a seamless, edgeless transition from the floor up your wall.
Cove Base Options: Form your own with our Epoxy Cove Base Compound and a cove base trowel, or purchase prefab cove base from EasyCove.com or SpeedCove.com (more costly but saves time).
Temperature Requirement: Floor and room temperature must stay be 60°F or higher for the entire curing process.
Surface Preparation
Apply epoxy in a temperature range of 60–95°F. Clean the floor thoroughly. Oil stains must be removed or primed with our proprietary Oil Primer prior to application.
Option A: Acid Etching
Power washing the floor first will yield better results. Then etch with the supplied acid etching solution:
- Mix the etch solution with water in a 3-to-1 ratio (water to acid)
- Pour evenly over the floor and brush in with a stiff bristle shop broom
- Let sit for 5–10 minutes, then rinse thoroughly
- Sprinkle the provided TSP powder evenly over the floor, brush in, and rinse. If etching twice neutralize on the second rinse only.
- Let the floor dry 24–48 hours minimum — concrete must be completely dry
New or Very Dirty Floors: Etch a second time with muriatic acid if it's a new floor or if your floor is heavily soiled.
Option B: Diamond Grinding
If grinding, etching is not necessary. Remove all dust prior to application. A floor prep machine from Home Depot does an excellent job.
Before & After: Properly Prepped Floor (Grinded & Etched)


Oil stains were cleaned with Liquid Tide and muriatic acid
Apply the Primer
Mix each can of the primer individually, then combine per the mix ratio stated on the front label. Roll on in an even coat and let dry to the touch. To test when primer is ready for the epoxy layer press your thumb into it, no fingerprint is good to go.
Red or White Orders: You will receive two coats of primer. Allow the first coat to dry 5–20 hours before applying the second coat.
Allow 5–20 hours after primer completion before applying the epoxy. If more than 20 hours have passed, sand the primer with 100-grit sandpaper to roughen up the surface before proceeding.
Mix & Apply the Epoxy
Mix each can of the epoxy individually, then combine the two parts in a 2:1 ratio (2 parts A to 1 part B — not the typical 1:1 ratio!). Mix for 2 1/2 minutes using the supplied power drill-mounted paint mixer at low speed, moving the wand up and down and scraping sides and bottom for a thorough mix.
Critical — Pot Life: Once mixed, Armor Ultra Epoxy has approximately 35-40 minutes of pot life at 70°F before it starts to thicken. Do NOT mix all the paint at once — this is NOT like store-bought epoxy with several hours of pot life.
Batch Size Guidelines
- Maintain the 2:1 ratio for each batch — don't mix more than you can apply in about 30 minutes
- 1 person rolling: Mix 1 gallon at a time
- Multiple people: You can mix larger batches but immediately split into 1-gallon pails to slow the thermal reaction
- Example: 3 people rolling? Mix 3 gallons, then immediately divide into three 1-gallon pails and give each a quick stir
Application Method
Pour a "bead" of the mixed material from left to right onto the floor and squeegee out with the supplied calibrated notched rubber squeegee — do not use a roller pan. The notched squeegee automatically spreads the epoxy at the proper thickness. Once evenly squeegeed out, roll over it with the supplied roller to smooth the ridges and do additional spreading until an even coat is achieved.
Then mix the next batch — this will reactivate whatever epoxy is on the roller, squeegee, and mixer, so you don't have to worry about hardening between batches. Continue until the floor is done. All sections will blend into a seamless finish.
Dry Time: Let dry for 10 hours or overnight, but not more than 20 hours. The epoxy should be rock hard. Do the thumb test.
Warning — Do NOT leave rollers or squeegees on the floor or leaning against walls or columns. They will be permanently welded to whatever surface they're touching by morning. Dispose of all rollers and squeegees immediately when done. Keep a small can of Xylene (available at Ace, Home Depot, or Lowe's) on hand for clean-ups.
Apply the Topcoat
Apply topcoat within 20 hours after epoxy application. Mix the topcoat in the can at low to medium speed to avoid introducing air bubbles for 1 minute.
Nonslip Option: Mix the nonslip additive into the topcoat for a slip-resistant surface and even more durability. Our Micro Tubular Aluminum is a high-tech nonslip designed to act as rebar in the coating while providing a slip-resistant finish. Stir the topcoat frequently to keep the nonslip suspended.
Use a roller pan and roll on the topcoat like regular paint. Dry times after topcoat:
- 6–7 hours: Foot traffic (thunb test to confirm)
- 24 hours: Light duty traffic (carts, dollies)
- 48 hours: Vehicle traffic
- 72 hours: Heavy traffic (forklifts)
You now have the finest and most durable epoxy floor coating possible!
Crew Size & Timing Guide
Average application speed is 1,000 sq ft per hour for two people per coat. Scale your crew based on floor size:
With the right crew size, each coat can be completed in about 5–6 hours — even on very large floors.
Resources & Navigation
Talk to an expert at 866-532-3979 — info@armorgarage.com or Request a Quote for project pricing and expert recommendations.
How quick can I get one of your epoxy flooring kits?
Standard colors ship out the in 2-3 business days(please allow extra time due to labor shortages and trucking delays) by Fedex ground or common carrier. Cut off time is 1 PM Eastern time. Orders placed after this time are processed the next day.
Why is Clear additional cost?
To do a clear floor properly requires a highly UV resistant coating since clear is the most susceptible to yellowing. Our Clear epoxy is specially formulated not to yellow.
Why is Red and White more cost?
Red and White are what we call high pigment colors, they require much more pigment to get that bright White and bright Red look. Also you get a lot less coverage so we have to ship more product so that you don't get any concrete bleed through or a dull finish, we supply the proper amount of materials for all our orders, that's why the finished look of all our floors is so good. With White and Red you will get two base coats and then either a Red or White colored Topcoat.
Is the Military Industrial Epoxy Flooring over kill for a residential garage?
Many of our customers use the Ultra Military System in their garages when they want the absolute highest protection. Is it necessary, no. You can always over protect with no down side but you should never under protect. Meaning you can use our Military or our Commercial epoxy coatings in a residential garage but you can't do the opposite.
What is the temperature range for application?
55 degrees or warmer is the ideal floor temperature. The warmer the floor the faster the coatings will dry. Do not apply if temperatures will drop below 55 within 8 hrs of application.
My floor is new do I still have to etch?
New floors still have to be etched clean in fact new floors should be etched twice and concrete must be at least 28 days old.
Should I repair cracks in the floor first?
Yes, use or Instant Crack Repair for most cracks and divots. Simply mix Part A & Part B and putty knife into repair area, lets you coat right over it without having to wait for it to cure. For larger cracks and repairs use our Crack & Joint Filling Compound. Super strong will never crack or chip out. See our Concrete Repair Products Page.
When you say the epoxy is self leveling will it level my floor?
Self leveling means the coatings will self level themselves, not the floor. If you need to resurface or level your floor you need to use a self level floor slurry. We recommend you use a good quality slurry and not those available from your Home Improvement store which are subject to chipping and cracking. Check with manufacturer for wait times before applying an epoxy coating.
Should I fill in saw cuts and expansion joints?
We recommend that you don't fill in your saw cuts or expansion joints unless your floor is 5 years or older. They're there for a reason. The last thing you want is a crack down the middle of your brand new shinny epoxy floor. If there's a crack at the bottom of the saw cut you can fill it with one of our crack fillers but it's really not necessary just feather the three epoxy coating in and out of the cuts to give a proper finished look and don't worry about debris accumulating in the joints, the epoxy will make the joints nonstick so you can simply sweep or leaf blow and debris out. Not filling in the joints will give the floor a nice dimensional look. If you absolutely cannot live with the saw cuts or expansion joints then you can fill them in with our crack & joint compound. If you have a true expansion joint, one with a black material in it then use our Flexible Joint Compound.
Can I do curbs & walls?
Ultra Epoxy Flooring can be applied to curbs and steps for walls we recommend our Industrial Wall Epoxy since it is designed not to drip or run down a large vertical surface.
Can this be applied outdoors?
Ultra Epoxy Flooring is not recommend for outdoor exposure. See our Ultra Fast version for outdoor rated epoxy.
Can I repair a scratch in my floor?
For scratch repair simply sand the area lightly with 100 grit paper and brush on some topcoat. The scratch will disappear and the new topcoat will blend into the old.
What can I use for clean up?
Use Xylene or Mineral Spirits for clean ups. Ultra Epoxy Flooring is incredibly strong so you need to clean up all spills or splatters while it's wet. DO NOT forget to throw out all squeegees and rollers when done with each coat. If you leave them leaning on a wall or column like some of our guys have done you will have to jack hammer them off the next morning. A small trap is also a good idea as a small mixing station.
Can I add color flakes to this floor?
Yes you can see our Industrial Flake Floor option.
Epoxy Flooring Abrasion Testing & Why Topcoats Matter
ASTM abrasion ratings explain real-world wear from tires, forklifts, pallet jacks, and heavy traffic.
During ASTM abrasion testing, a weighted abrasion wheel is placed on the coating and run for a set number of rotations (RPM). We then measure how much coating material is removed. This simulates real wear from vehicle tires, forklifts, pallet jacks, and high-traffic environments.
Result: Our coating loses an extremely low 4mg while our closest competitor loses 24mg. That’s why our clear topcoat resists scratches, scuffs, and daily wear at a level most products simply can’t match—thanks to the patented high-performance polymers we use.
If you haven’t done so yet, watch the video in our Case Studies section. It shows a close-up of a car’s tires twisting into a tight parking spot—an excellent visual and audio example of the stress tires put on your coating.
That page also shows how tough our epoxy coatings are with several old age floors that are 16+ years old—after years of use some still look like the day they were applied.
Using a single-coat system or a water-based epoxy for heavy-traffic commercial floors is a costly mistake. This system is engineered for maximum adhesion, impact resistance, and abrasion durability.
Epoxy floors fail for three reasons:
(1) delamination (2) chipping/cracking (3) abrasion wear-through
- Primer: Two-part high-performance epoxy that penetrates concrete pores and creates a permanent bond. Even alone, it can outperform many “epoxy floor paints.”
- Epoxy base coat: Extra-thick, high-build 100% solids epoxy that provides mass for strength—protects against hot-tire lifting, impacts, and heavy loads.
- Urethane topcoat: Ultra-hard high-wear clear topcoat that keeps the floor looking new. If it ever wears down, you simply roll on another coat—without touching the primer or epoxy.
Rule of thumb: You need 14 mils or higher and an abrasion loss rating of 8mg or lower for high-traffic, high-wear floors. Under-rating your system leads to rapid appearance loss and premature failure—often requiring expensive diamond grinding to remove the coating and start over.
Typical epoxies show abrasion loss ratings from 24mg to 50mg—exponentially softer than our 4mg loss rating. Many manufacturers don’t publish topcoat specs because performance is so poor.
Every time there is movement on your floor, it causes abrasion. Abrasion wears the floor down, allowing staining and other issues to occur. Once the topcoat is worn off, the epoxy fails quickly.
With a top-rated topcoat, your floor will be impervious to the destructive forces put on industrial floors and will only need the application of a new layer of topcoat to bring the floor back to new rather than a total diamond grind and full recoat.
If needed, you can coat your floor in sections:
- Lay a straight tape line (use a strong tape like Gorilla tape).
- Apply primer/base coat up to the tape line.
- Apply epoxy to about 6" from the tape line.
- Apply topcoat to about 6" from the epoxy line.
- Remove the tape and feather each layer over its respective coating—this blends without a visible seam.
Two great pages to read are How to Avoid an Epoxy Flooring Failure and How to Prep & Paint Your Floor the Right Way .


